Blog

Download Bank Data in Shapefile, KML, GeoJSON, and More – Filter and Download

Download and filter bank data in formats like Shapefile, KML, and GeoJSON with MAPOG for detailed mapping and analysis.

MAPOG offers a powerful tool to help you locate and download bank data. This information can be invaluable for creating maps, planning financial analyses, and exploring various banking locations. In this guide, we’ll walk you through the process of downloading bank data using MAPOG in multiple formats.

GIS Data is a specialized type of information that lets you visualize and analyze geographic locations on a map. With MAPOG, you can access GIS data that includes details about bank branches and their locations.

Download Bank GIS Data of any countries

Note:

  • All data provided by MAPOG are in GCS datum EPSG:4326 WGS84 CRS (Coordinate Reference System). 
  • Access to shapefile downloads requires logging in to the platform.

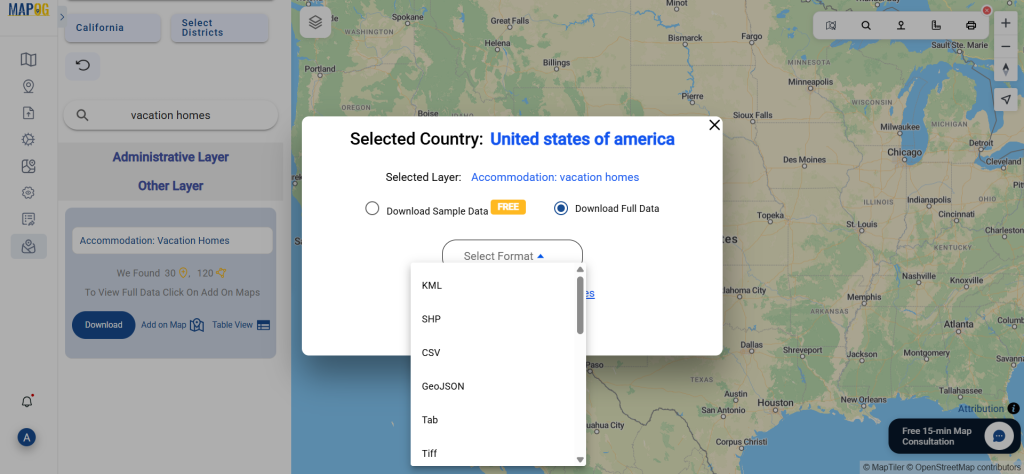
Bank data is crucial for several reasons. It helps individuals find nearby banking services and assists businesses in analyzing financial service distribution. With MAPOG GIS Data, you can download information about banks in multiple file formats, including KML, SHP, CSV, GeoJSON, Tab, SQL, Tiff, GML, KMZ, GPKZ, SQLITE, DXF, MIF, TOPOJSON, XLSX, GPX, ODS, MID, and GPS. This versatility allows you to use the data with various software and devices for diverse projects or analyses.

Step-by-step Process to Download Bank Data

Step 1: Open GIS Data

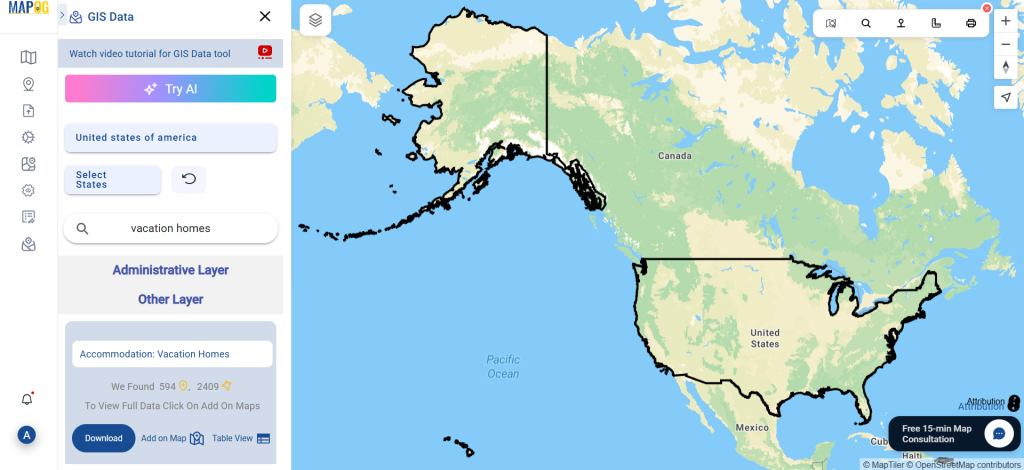
Log in to MAPOG using your email credentials. After logging in, navigate to the GIS Data tool. You can easily find this in the top navigation menu. Look for the bank GIS data category or use the search function. For example, you can search specifically for the bank networks of countries like USA, UK, Germany, and Egypt.

Download Bank GIS Data

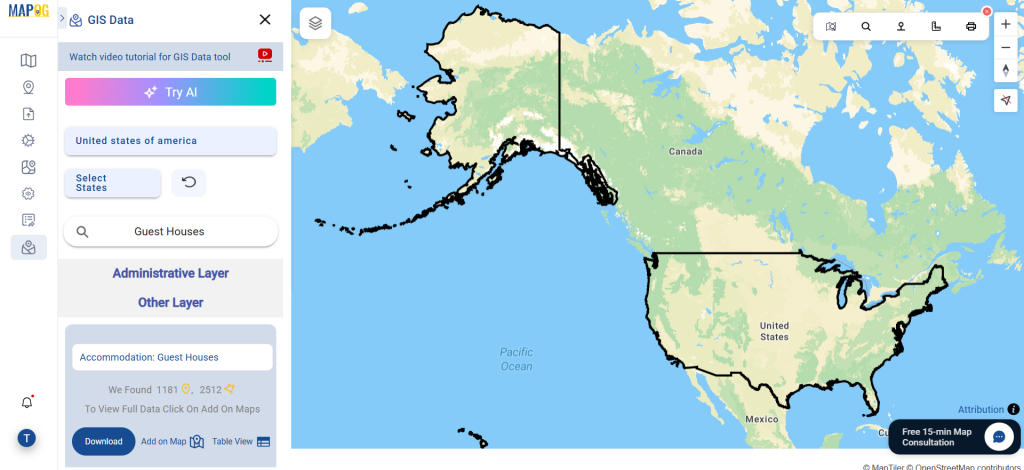
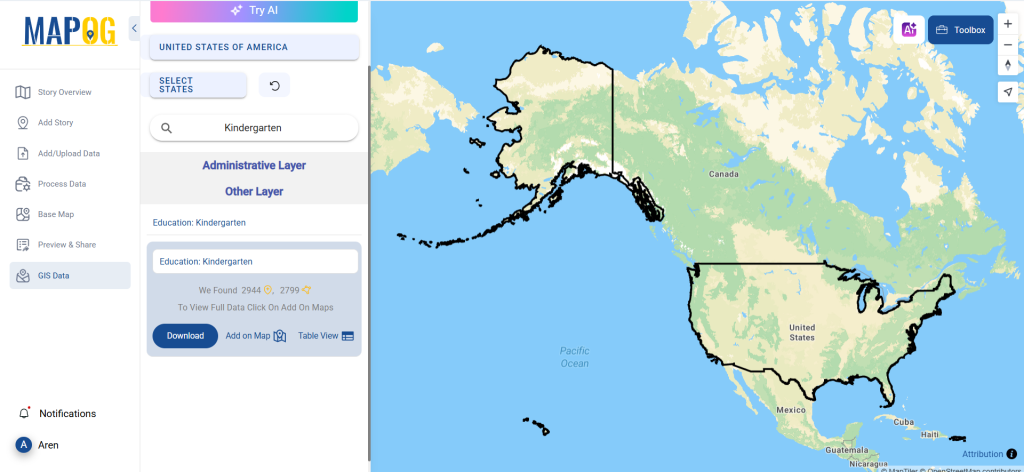
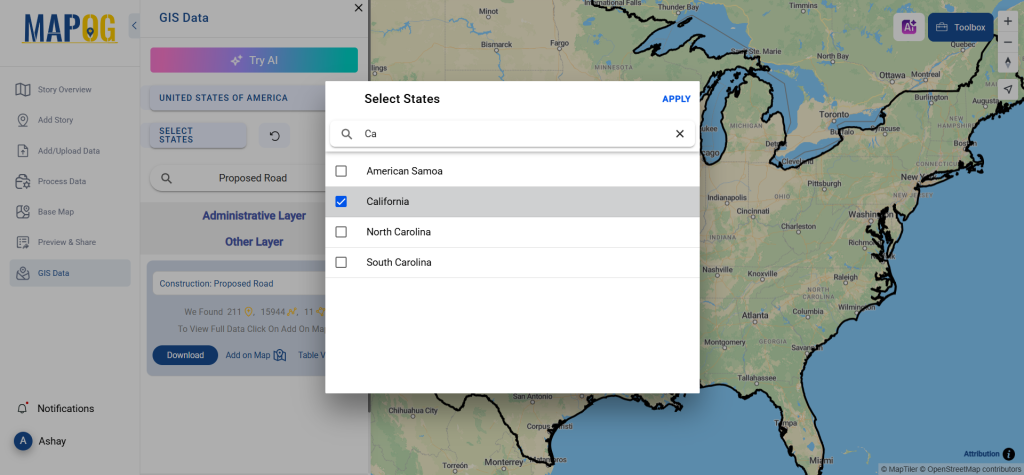
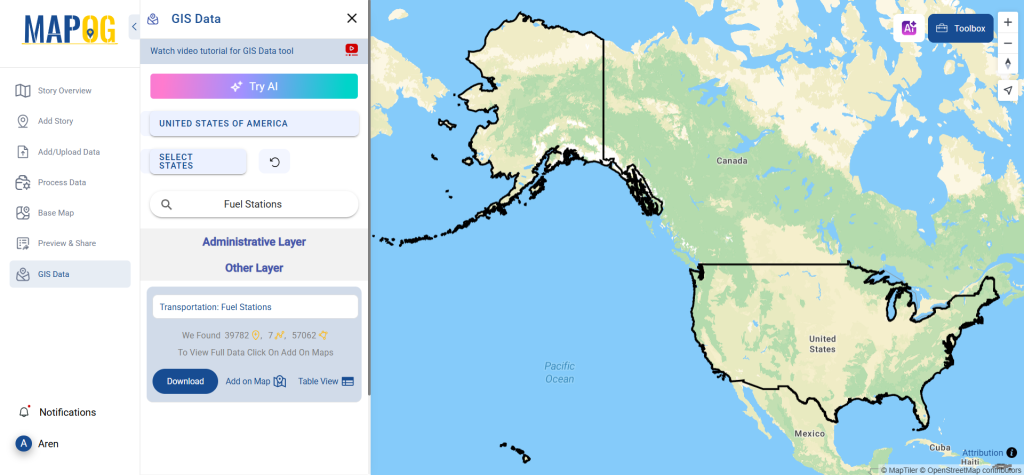
Step 2: Select the Country and Search for ‘Bank Data’

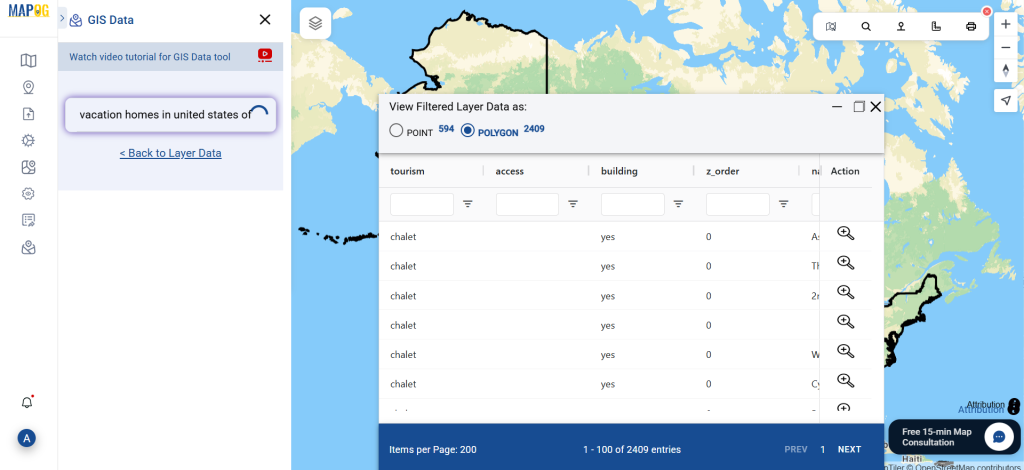
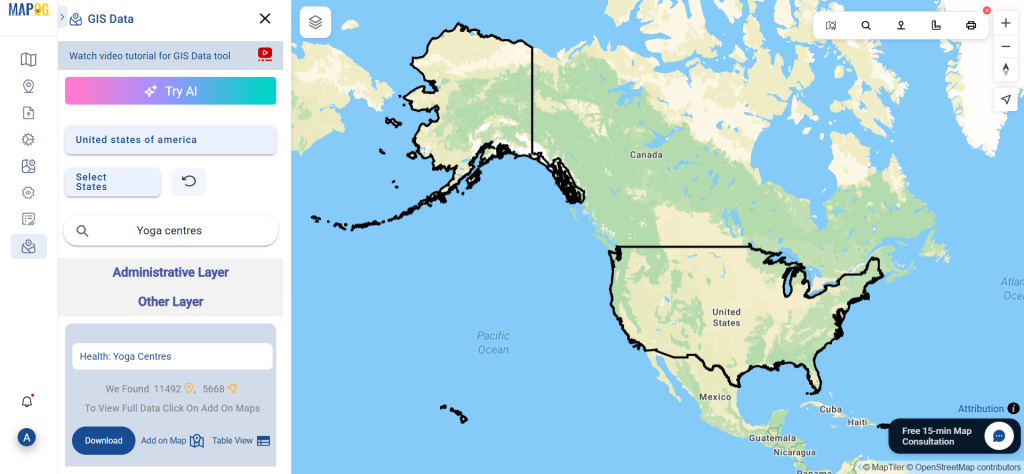
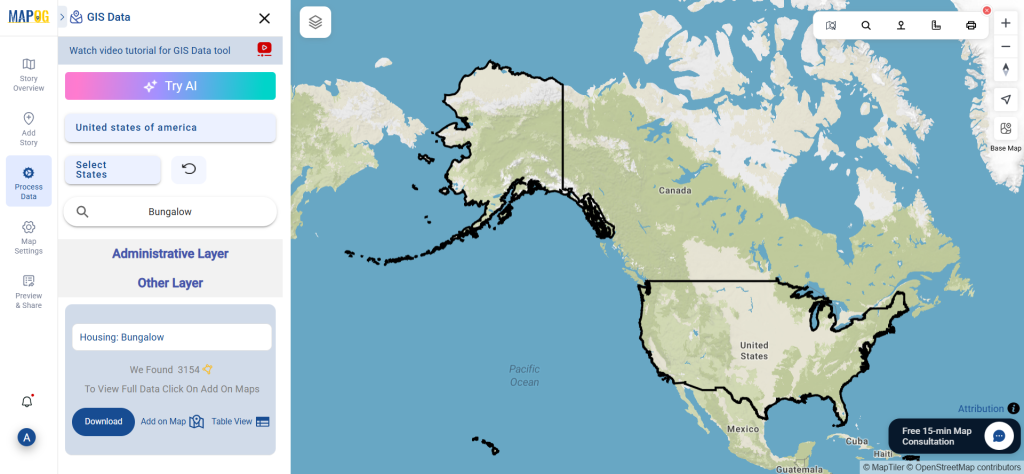
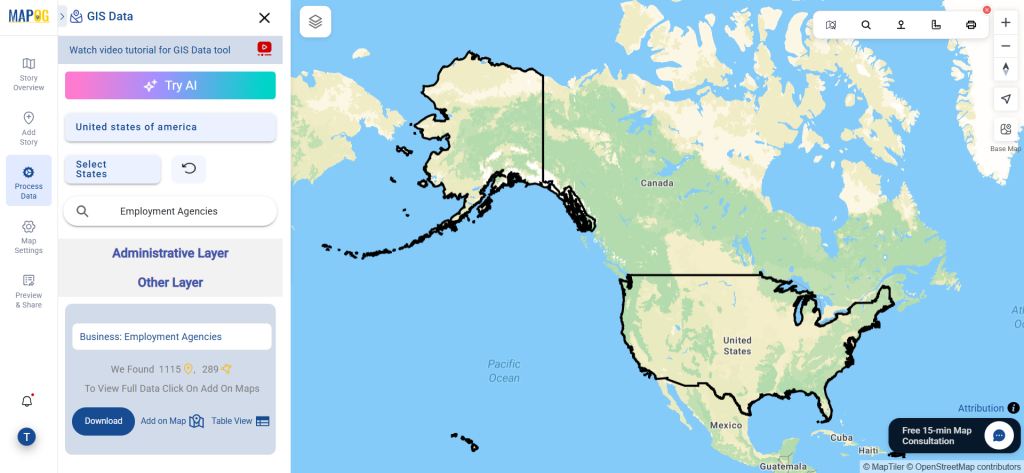
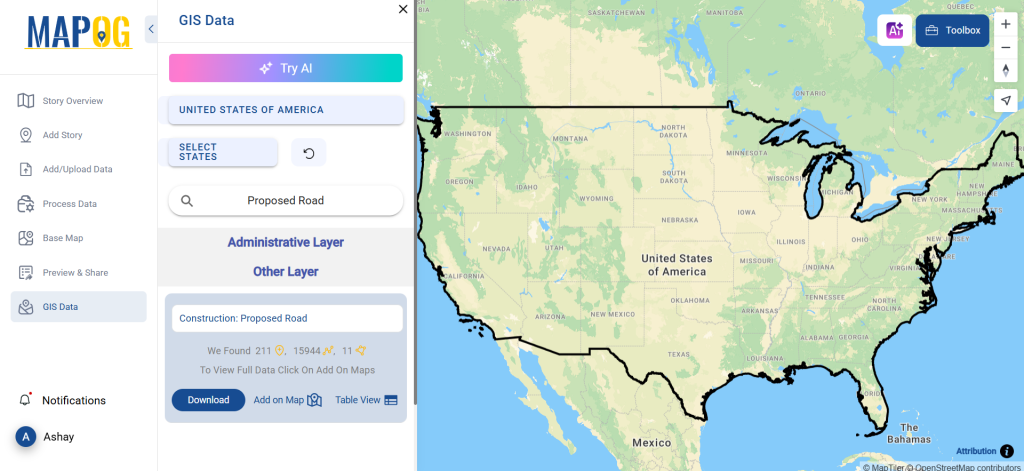
Start by selecting the country you’re interested in. Navigate through the available options and choose the specific country where you need hotel data. After selecting the country, search for the ‘Bank Data’ layer that contains the relevant information.

Select the Country and Search for ‘Bank Data’

If you’re unsure which country or layer to choose, use the “Try AI” feature and It gives smart suggestions based on your needs and help you find the right data easily.

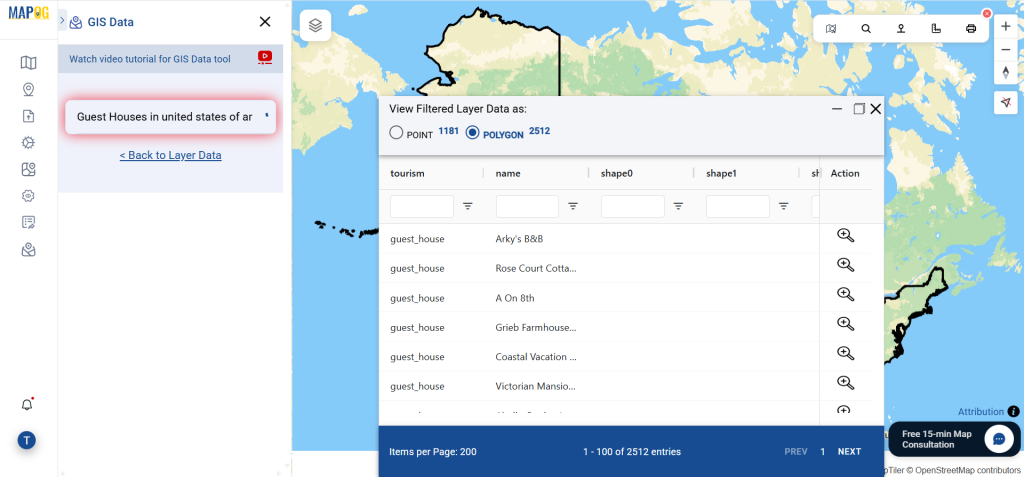
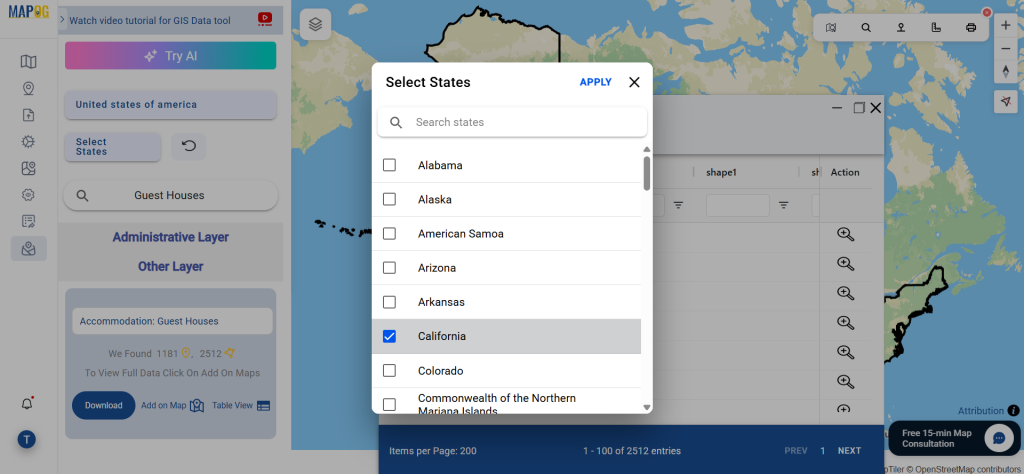
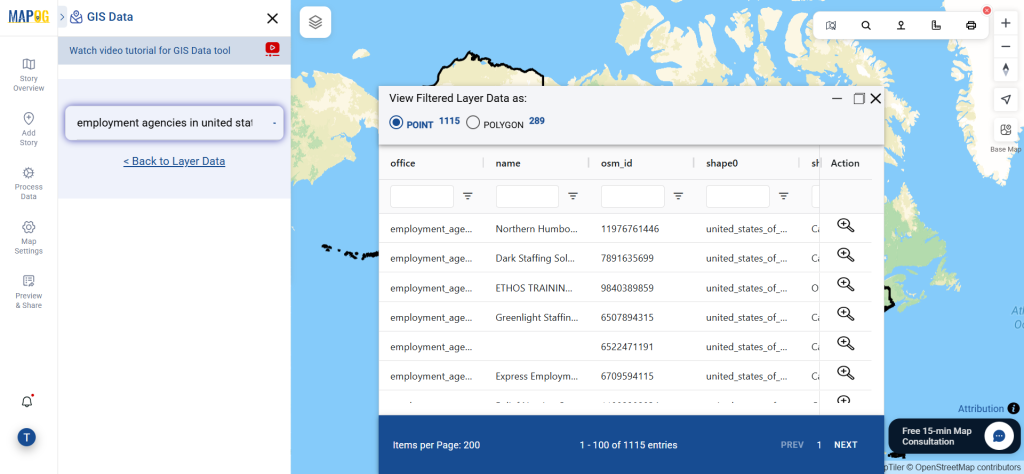
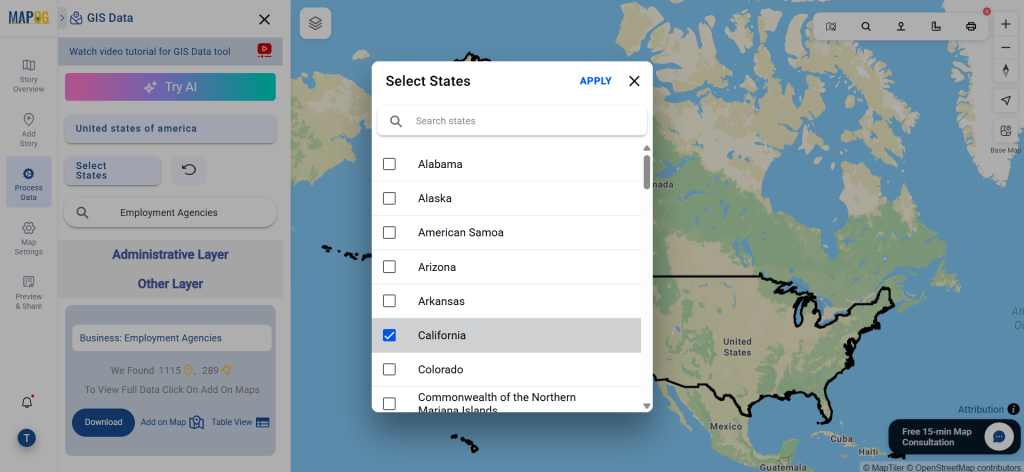
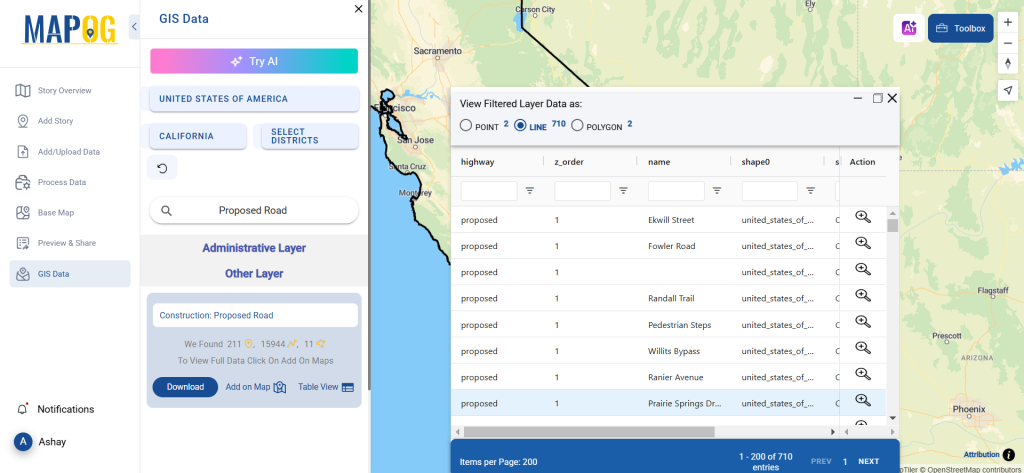
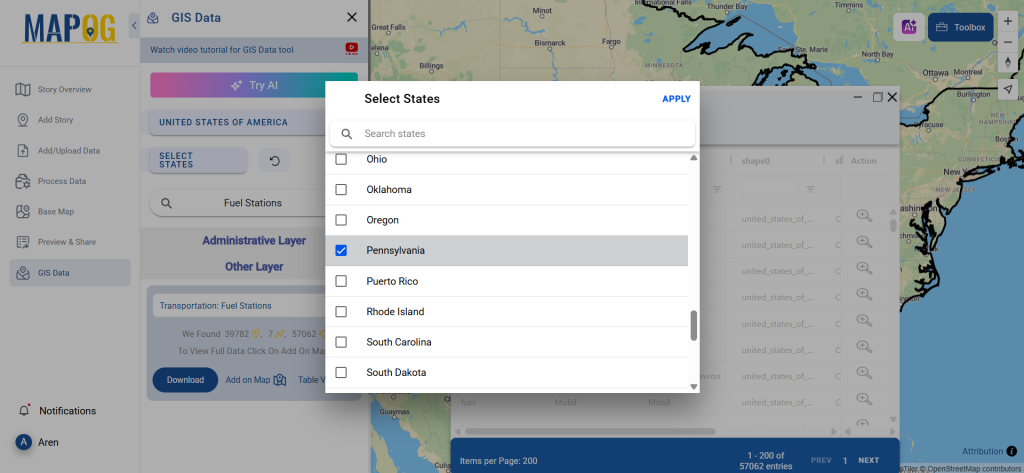
Step 3: Filter the Data

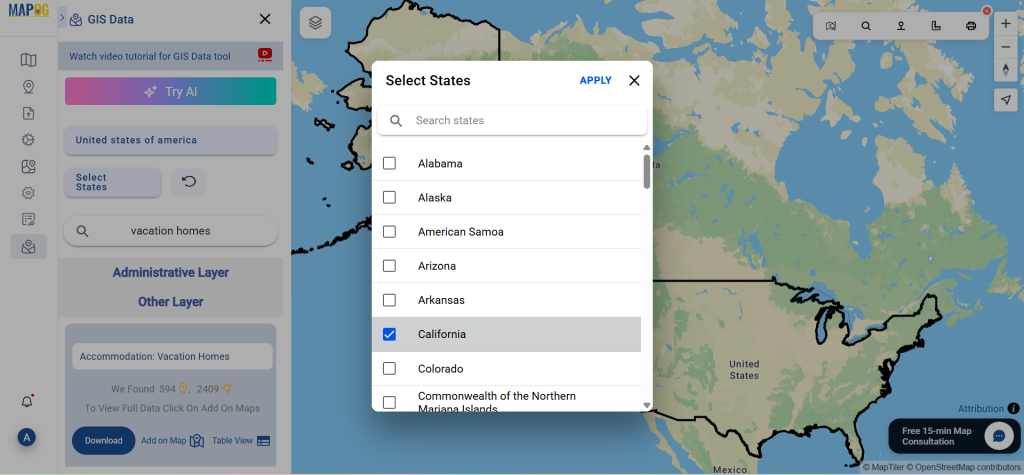
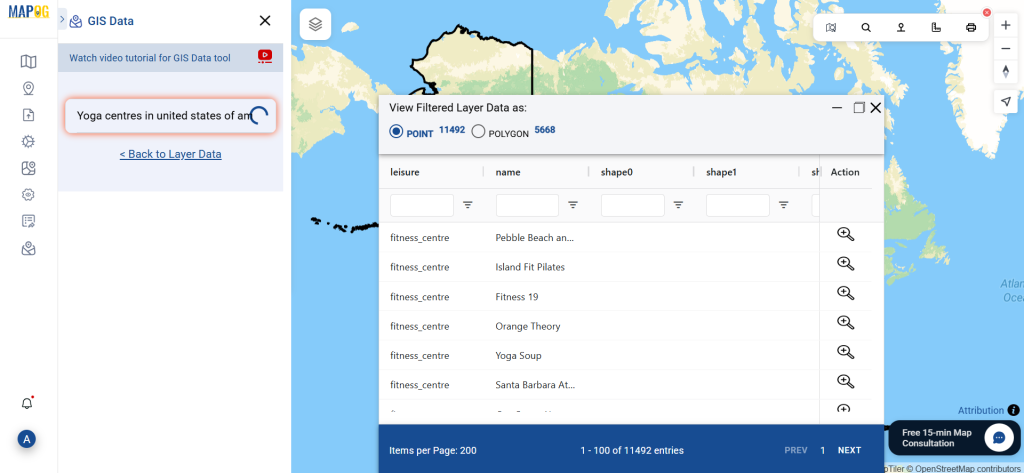
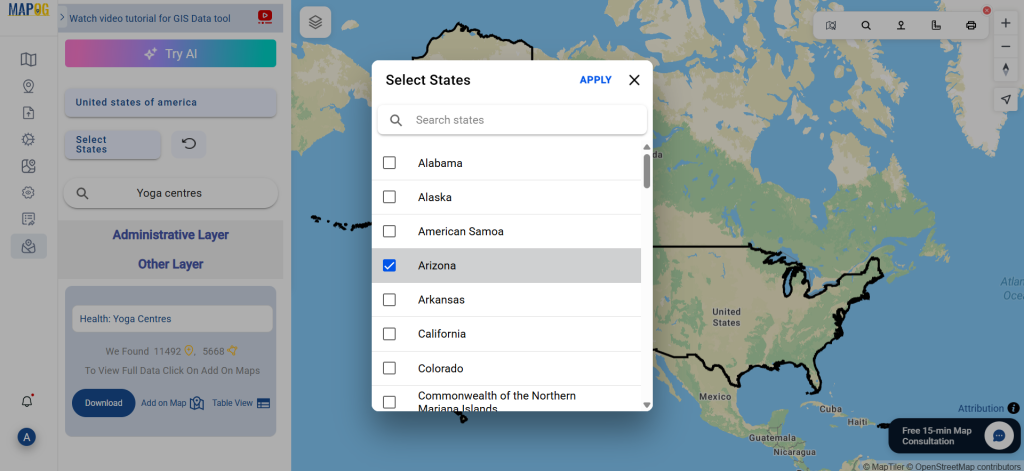
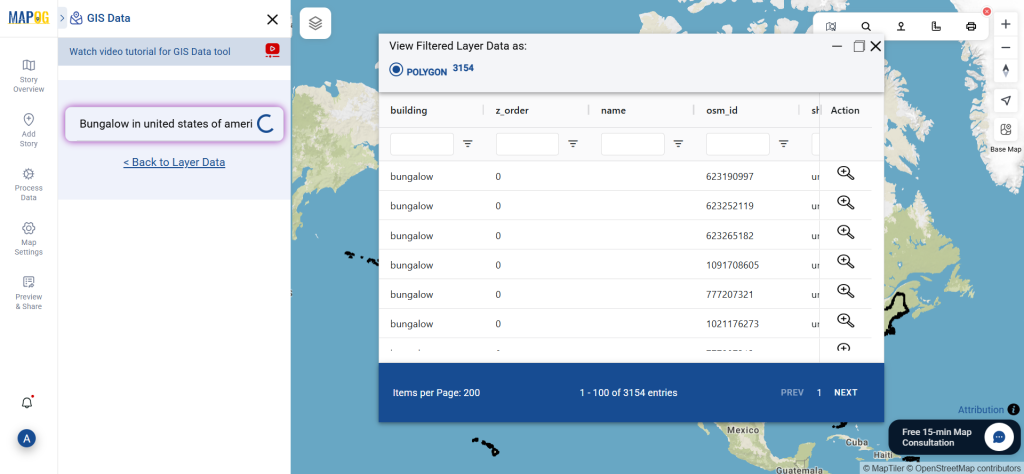
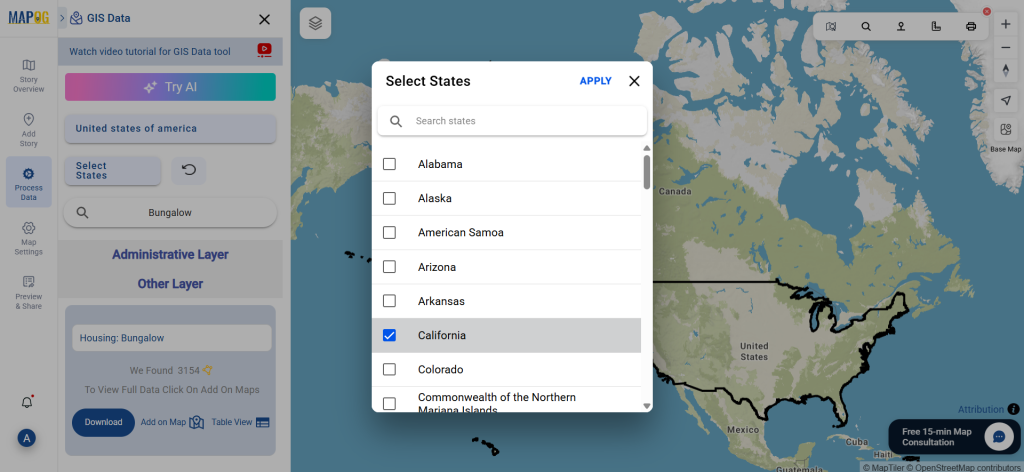
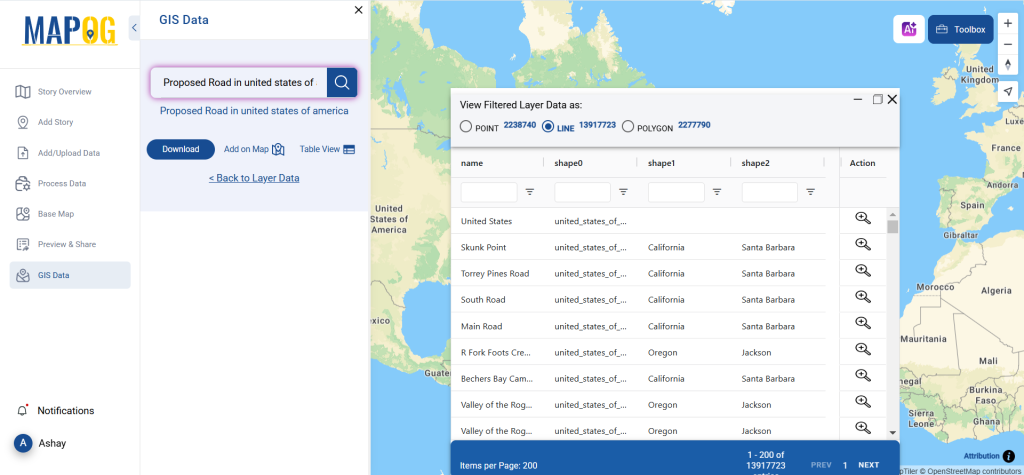
Apply the available filters to refine your search. You can select specific areas, types of banking institutions or other criteria to get the exact data you need.

Filter the Data

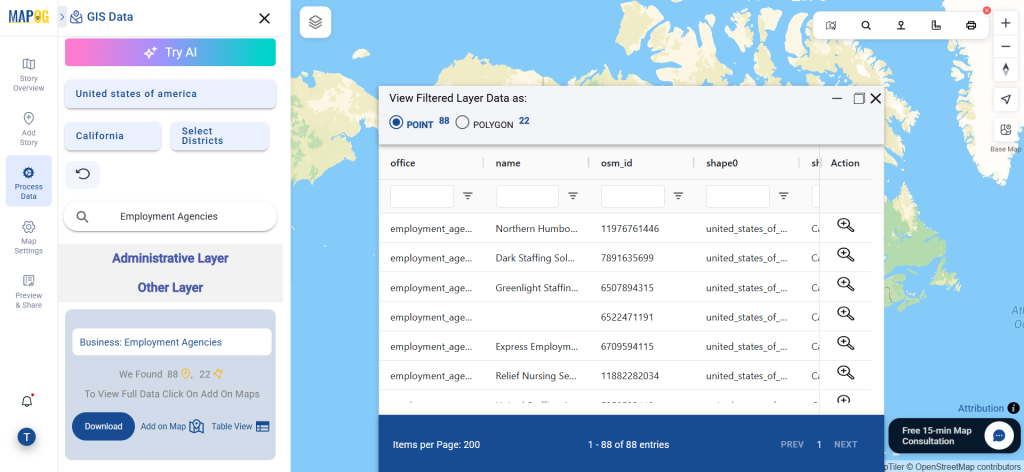
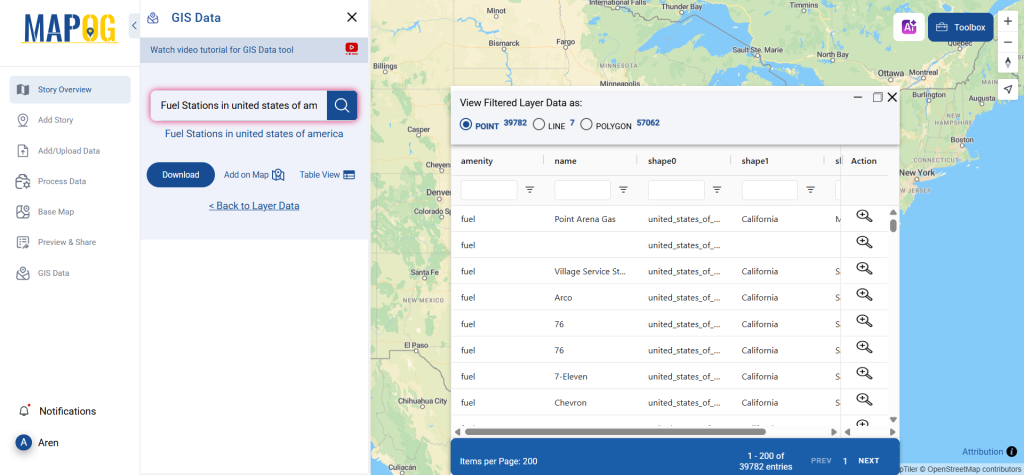
Step 4: Add to Map

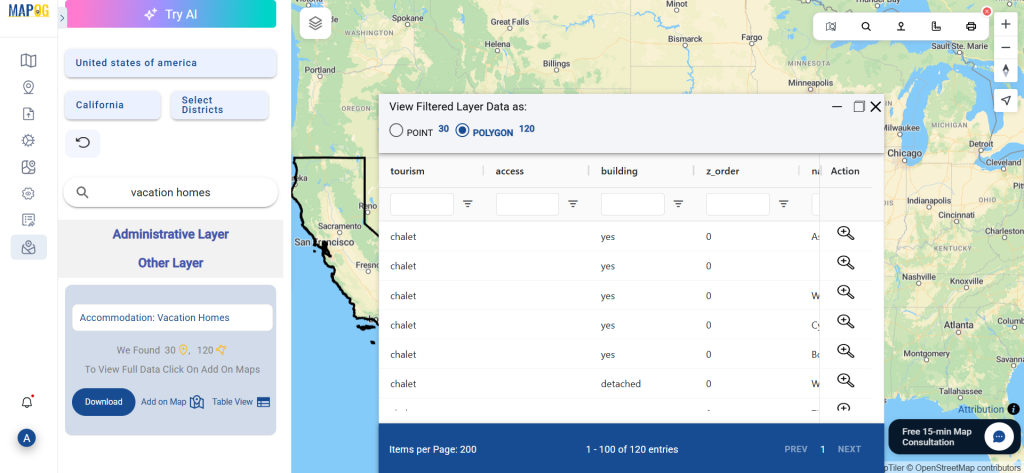
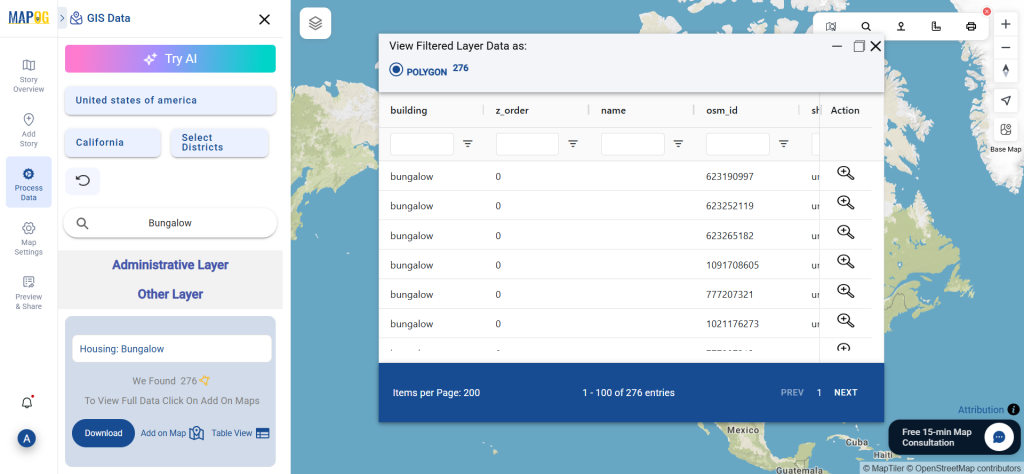
After filtering the data, add it to your map and This step will show the locations of bank branches on your map, making it easier to visualize their placement.

Add to Map

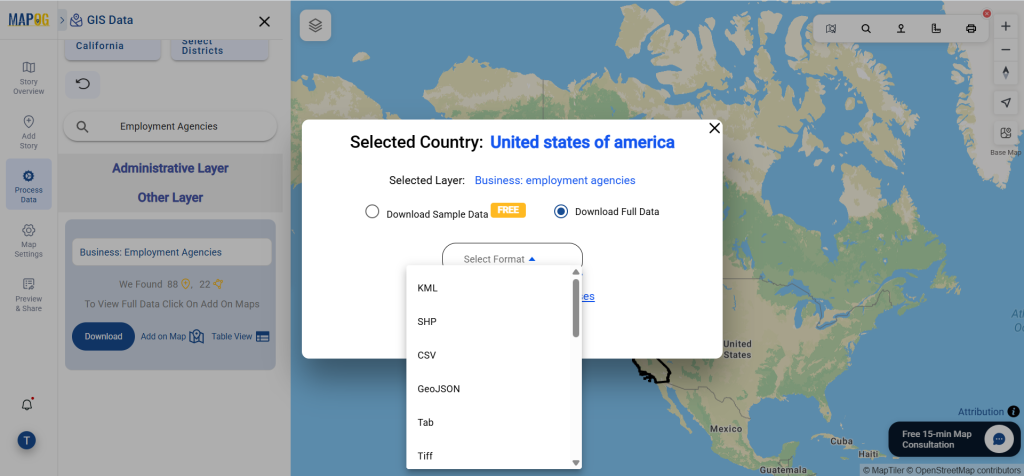
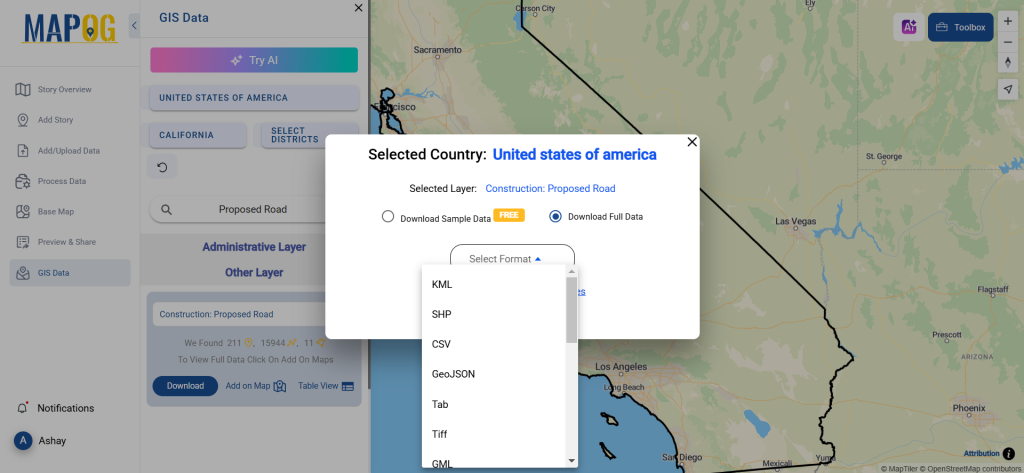
Step 5: Download the Data

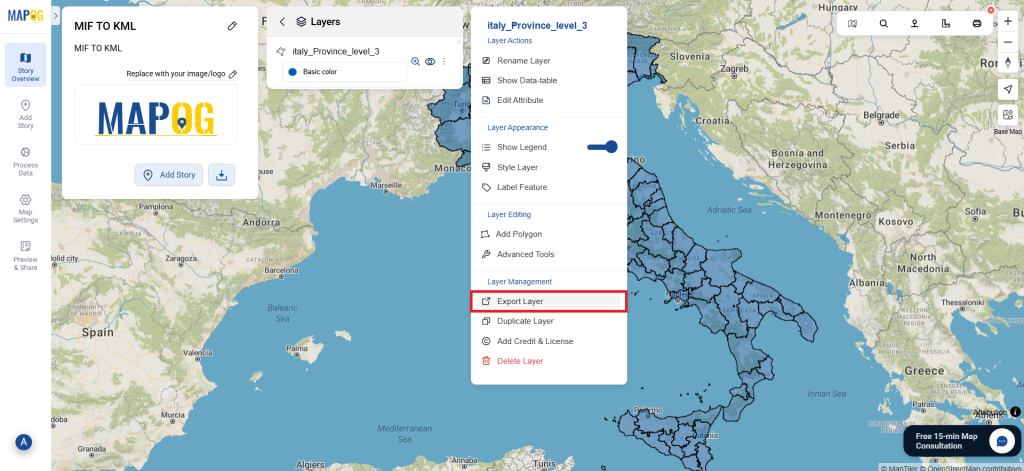
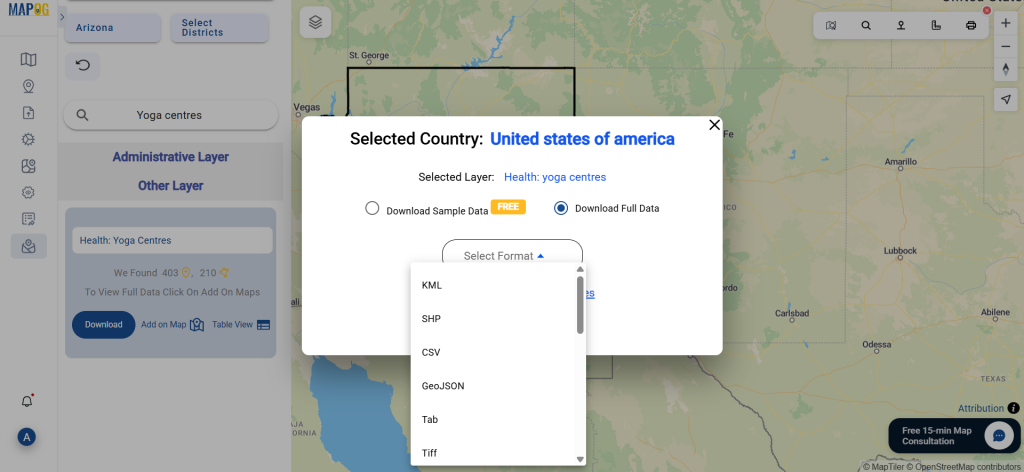
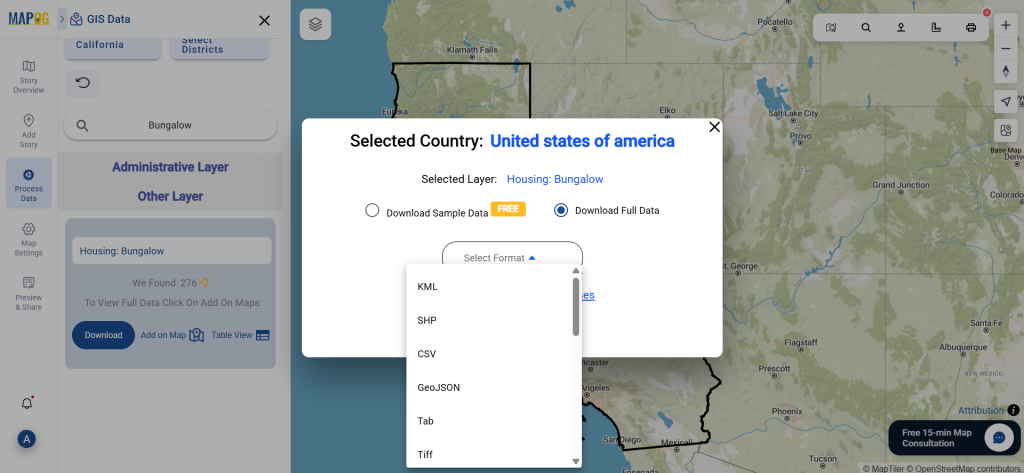
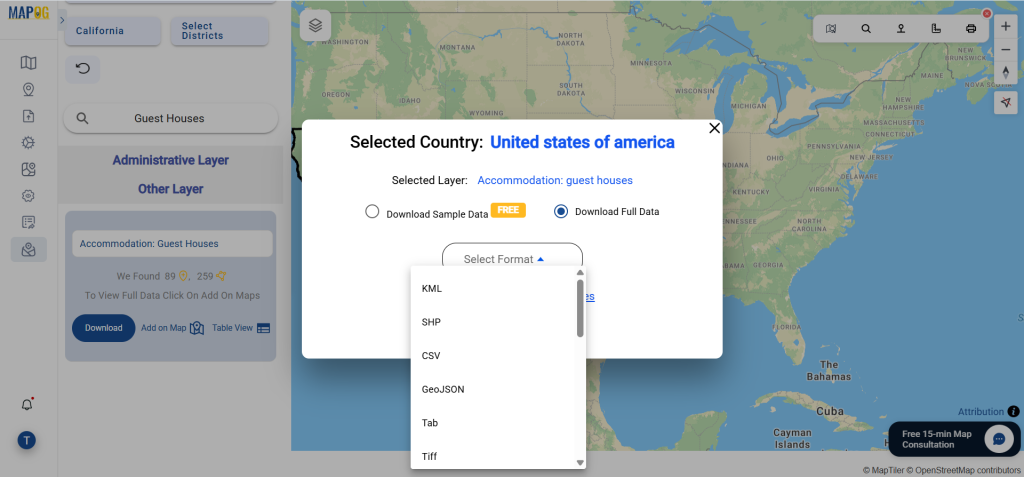
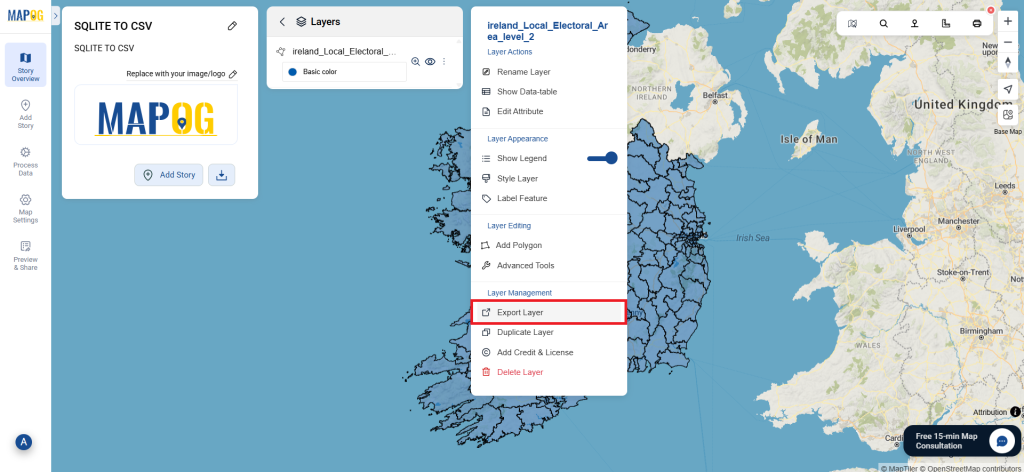
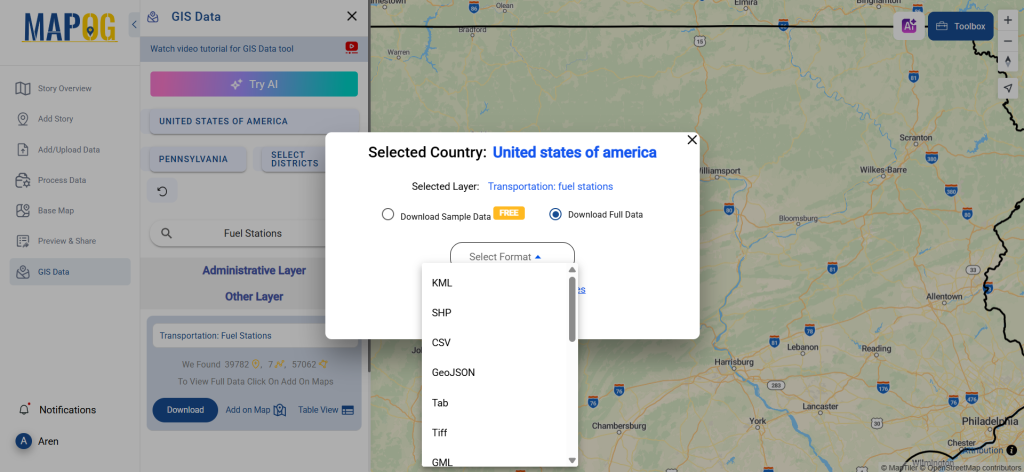
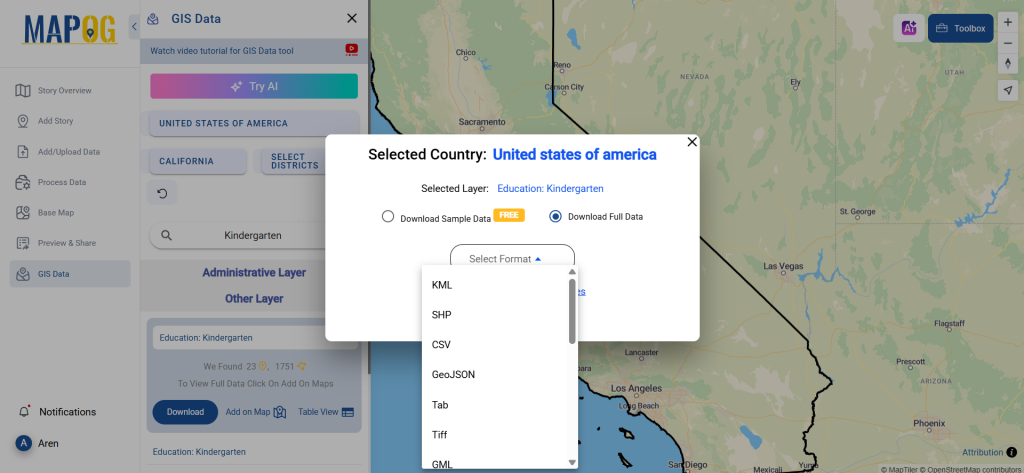
After reviewing the map, click the download button to download bank data. You can select from various file formats depending on your project needs.

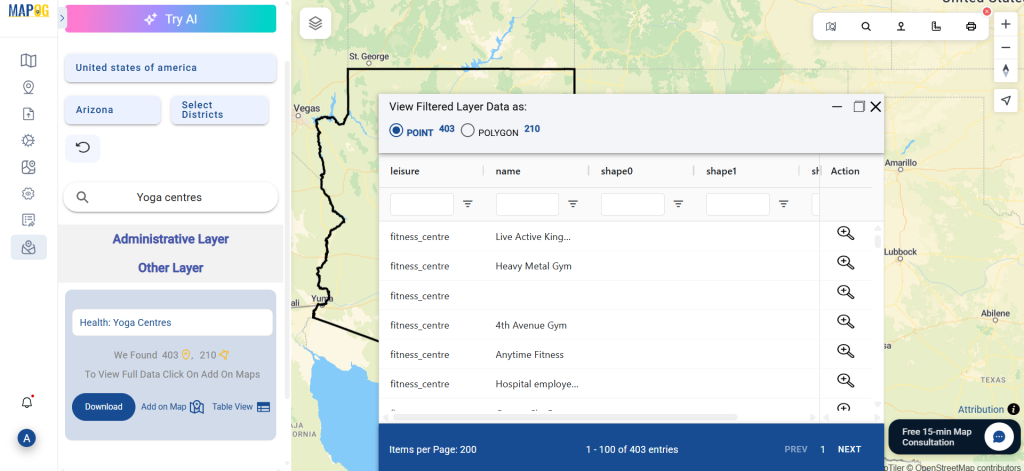
Download the Data

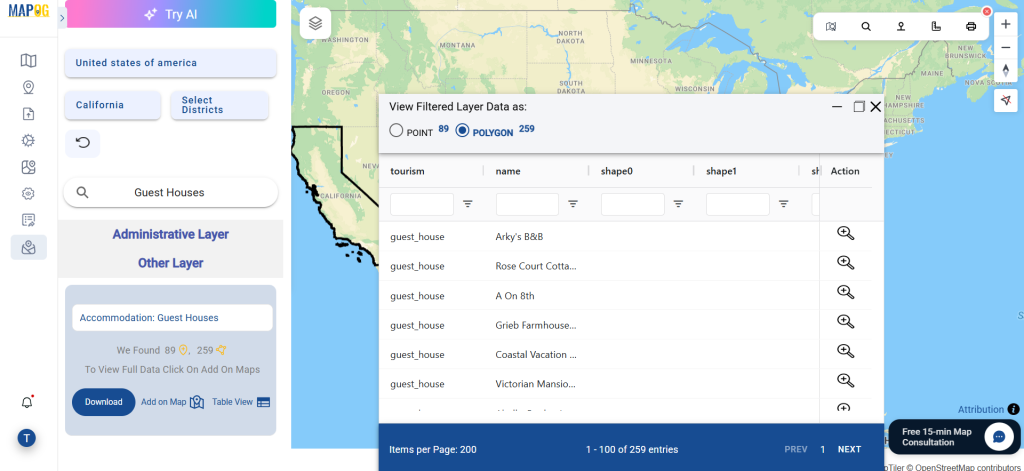
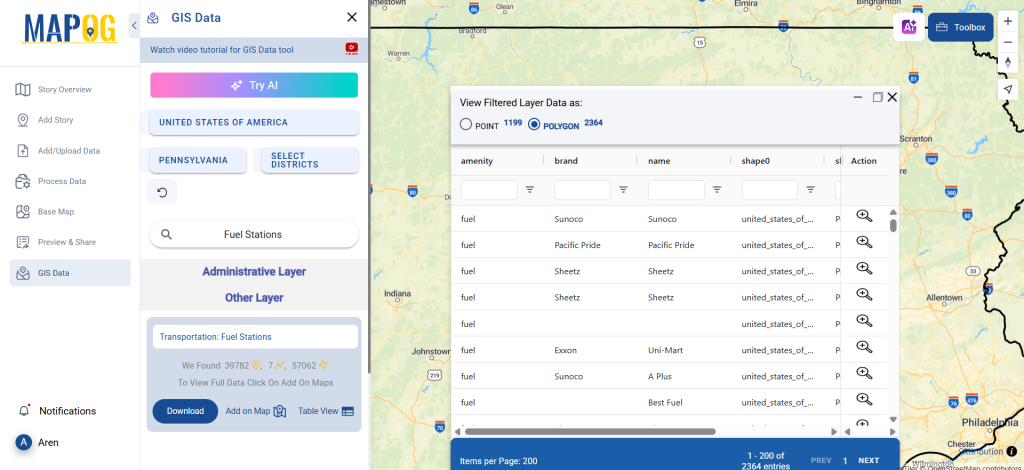
Bank data consists of both point and polygon features because point data shows the exact location of each bank branch, while polygon data illustrates the boundaries or areas around banking facilities. These features provide a detailed view of bank locations and their surroundings and beneficial for creating comprehensive maps and conducting thorough analyses.

Discover the MAPOG’s Map Analysis  tool, allowing you to effortlessly, Upload vector and raster files, Add WMS (Web Map Service) layers, Import Excel or CSV data, Merge and split polygons, Create new polygon and polyline data, Convert between various formats, Perform buffer analysis, Generate grids, Transform points to polygons, Calculate isochrones and support the geocoder for accurate location data.

For more information or assistance with downloading hotel data, please contact us at support@mapog.com.

Disclaimer:

The GIS data provided for download in this article was initially sourced from OpenStreetMap (OSM) and However, it has been further modified to enhance its usability. It’s important to note that the original data is licensed under the Open Database License (ODbL) by OpenStreetMap contributors. Although modifications have been made to improve the data, any use, redistribution, or further modification must still comply with the terms of the ODbL license. For additional details, please visit OpenStreetMap’s License Page.

Download Railway data in Shapefile, KML, GeojSON +15 GIS format

Download railway data in Shapefile, KML, GeoJSON, and 15+ other GIS formats. Access comprehensive datasets for enhanced mapping and spatial analysis.

Accessing accurate and up-to-date railway data is essential for GIS professionals, urban planners, and researchers. Whether you’re working on transportation analysis, infrastructure planning, or mapping projects, having railway data in the right format can significantly enhance your work. In this article, we will guide you through the process of downloading railway data in multiple GIS formats, including Shapefile, KML, GeoJSON, and over 15 other formats. We will be utilizing the MAPOG GIS DATA platform, a versatile tool that simplifies the process of acquiring and converting GIS data to meet your specific needs.

Download Railway Data

We offer an extensive array of data formats, including KML, SHP, CSV, GeoJSON, Tab, SQL, Tiff, GML, KMZ, GPKZ, SQLITE, Dxf, MIF, TOPOJSON, XLSX, GPX, ODS, MID, and GPS, ensuring compatibility and accessibility for various applications and analyses.

Steps to Download Railway Data

Step 1: Open MAPOG GISDATA Tool and Search for the Country

Begin by opening the MAPOG GISDATA platform. Once you’re on the platform, use the search bar to enter the name of the country whose railway data you wish to download. This will help you quickly locate the relevant geographic data specific to the country’s railway network.

Download Railway data in Shapefile, KML , GeojSON +15 GIS format
Open MAPOG GISDATA Tool and Search for the Country

Step 2: Search for ‘RailData’ in the Search Bar

In the search bar of the MAPOG GISDATA platform, type “Railway.” This will generate a list of different types of railway data available for download, including railway networks, platforms, railway crossings, bridges, and more. Select the specific type of data you need for your project.

Download Railway data in Shapefile, KML , GeojSON +15 GIS format
Search for ‘RailData’ in the Search Bar

Step 3: Add to Map for Visual Analysis

Once you’ve selected the railway data, click “Add to Map” to visualize it directly on the map. This allows you to see the spatial arrangement of the railway data and zoom in to explore specific features in detail.

Download Railway data in Shapefile, KML , GeojSON +15 GIS format
Add to Map for Visual Analysis

Step 4: Download the Data

After confirming that the data is what you need, click the “Download” button. Choose your preferred format—whether it’s Shapefile, KML, GeoJSON, or any other available format—to save the data for your project.

Download the Data
Download the Data

Conclusion

Accessing and utilizing railway data is crucial for various GIS-related projects, and the MAPOG GISDATA platform makes this process straightforward and efficient. By following the steps outlined in this guide, you can easily download railway data in the format that best suits your needs. Whether you’re working on transportation analysis, infrastructure planning, or any other mapping project, MAPOG ensures you have the right tools at your fingertips.

With MAPOG’s versatile toolkit, you can effortlessly upload vector and raster filesadd WMS (Web Map Service) layers, upload Excel or CSV data, incorporate existing files, perform polygon splitting and merging, generate new polygon and polyline data, use the converter for various formats, conduct buffer analysiscreate gridstransform points into polygons, calculate isochrones, and utilize the geocoder for precise location information.

For any questions or further assistance, feel free to reach out to us at support@mapog.com. We’re here to help you make the most of your GIS data.

Disclaimer: The GIS data provided for download in this article was initially sourced from OpenStreetMap (OSM) and further modified to enhance its usability. Please note that the original data is licensed under the Open Database License (ODbL) by the OpenStreetMap contributors. While modifications have been made to improve the data, any use, redistribution, or modification of this data must comply with the ODbL license terms. For more information on the ODbL, please visit OpenStreetMap’s License Page.

Download Shapefile for the following:

  1. World Countries Shapefile
  2. Australia
  3. Argentina
  4. Austria
  5. Belgium
  6. Brazil
  7. Canada
  8. Denmark
  9. Fiji
  10. Finland
  11. Germany
  12. Greece
  13. India
  14. Indonesia
  15. Ireland
  16. Italy
  17. Japan
  18. Kenya
  19. Lebanon
  20. Madagascar
  21. Malaysia
  22. Mexico
  23. Mongolia
  24. Netherlands
  25. New Zealand
  26. Nigeria
  27. Papua New Guinea
  28. Philippines
  29. Poland
  30. Russia
  31. Singapore
  32. South Africa
  33. South Korea
  34. Spain
  35. Switzerland
  36. Tunisia
  37. United Kingdom Shapefile
  38. United States of America
  39. Vietnam
  40. Croatia
  41. Chile
  42. Norway
  43. Maldives
  44. Bhutan
  45. Colombia
  46. Libya
  47. Comoros
  48. Hungary
  49. Laos
  50. Estonia
  51. Iraq
  52. Portugal
  53. Azerbaijan
  54. Macedonia
  55. Romania
  56. Peru
  57. Marshall Islands
  58. Slovenia
  59. Nauru
  60. Guatemala
  61. El Salvador
  62. Afghanistan
  63. Cyprus
  64. Syria
  65. Slovakia
  66. Luxembourg
  67. Jordan
  68. Armenia
  69. Haiti And Dominican Republic
  70. Malta
  71. Djibouti
  72. East Timor
  73. Micronesia
  74. Morocco
  75. Liberia
  76. Kosovo
  77. Isle Of Man
  78. Paraguay
  79. Tokelau
  80. Palau
  81. Ile De Clipperton
  82. Mauritius
  83. Equatorial Guinea
  84. Tonga
  85. Myanmar
  86. Thailand
  87. New Caledonia
  88. Niger
  89. Nicaragua
  90. Pakistan
  91. Nepal
  92. Seychelles
  93. Democratic Republic of the Congo
  94. China
  95. Kenya
  96. Kyrgyzstan
  97. Bosnia Herzegovina
  98. Burkina Faso
  99. Canary Island
  100. Togo
  101. Israel And Palestine
  102. Algeria
  103. Suriname
  104. Angola
  105. Cape Verde
  106. Liechtenstein
  107. Taiwan
  108. Turkmenistan
  109. Tuvalu
  110. Ivory Coast
  111. Moldova
  112. Somalia
  113. Belize
  114. Swaziland
  115. Solomon Islands
  116. North Korea
  117. Sao Tome And Principe
  118. Guyana
  119. Serbia
  120. Senegal And Gambia
  121. Faroe Islands
  122. Guernsey Jersey
  123. Monaco
  124. Tajikistan
  125. Pitcairn

Disclaimer : If you find any shapefile data of country provided is incorrect do contact us or comment below, so that we will correct the same in our system as well we will try to correct the same in openstreetmap.

Convert Online GPS to PDF : Step by Step Guide
In this guide, you’ll learn how to effortlessly convert GPS files into PDF format using the Converter Tool in MAPOG Map Analysis. Whether you’re new to the process or an experienced user, this step-by-step guide will walk you through the entire conversion process in a straightforward manner.

Understanding the Conversion Process

The Converter Tool in MAPOG Map Analysis is designed to transform your data from one format to another with ease. It’s like having a digital wizard at your fingertips! You simply input your data, and the tool outputs it in a format that best suits your analytical needs. Additionally, GIS Data is versatile and can be downloaded in various formats, making it adaptable for multiple uses.

Online GPS to PDF GIS Converter
Step 1: Upload Your Data

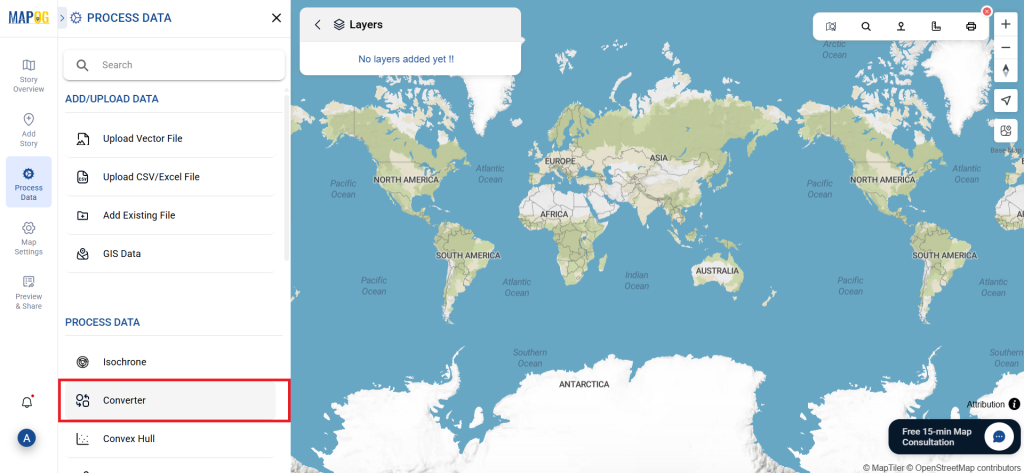
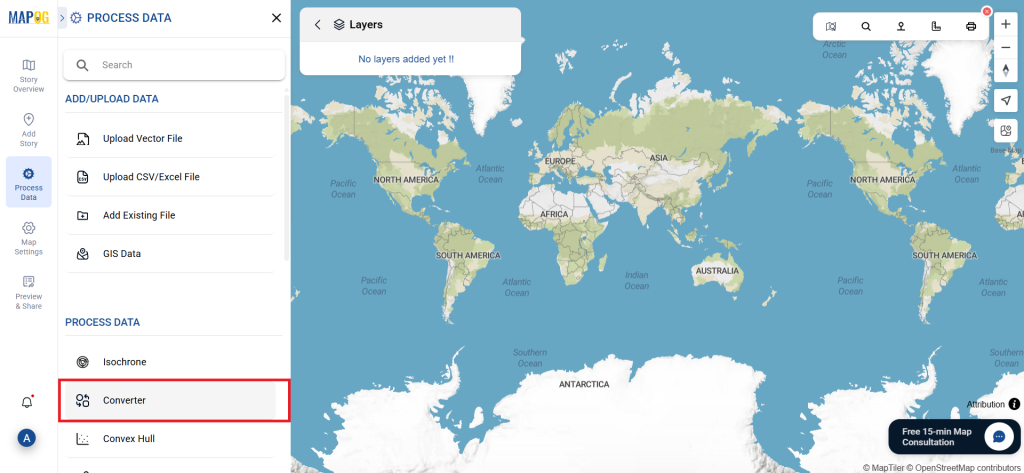
First, you’ll need to navigate to the “Converter Tool” via “Process Data.”

GPS to PDF

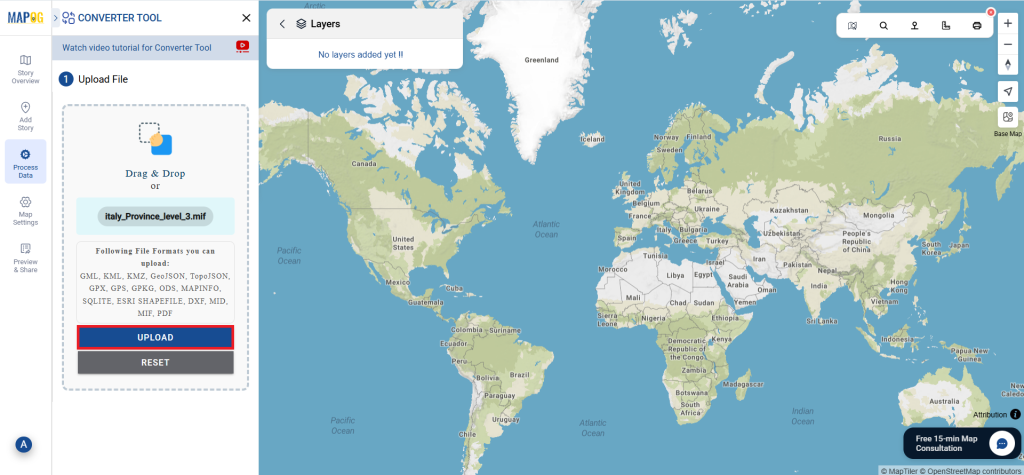
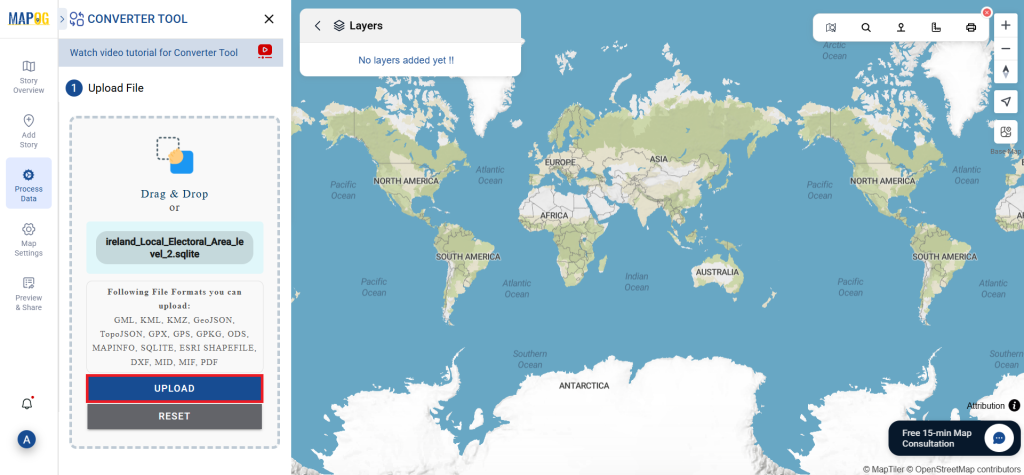
Upload your GPS file, which serves as the starting point for your conversion process.

GPS to PDF
Step 2: Choose the Conversion Format

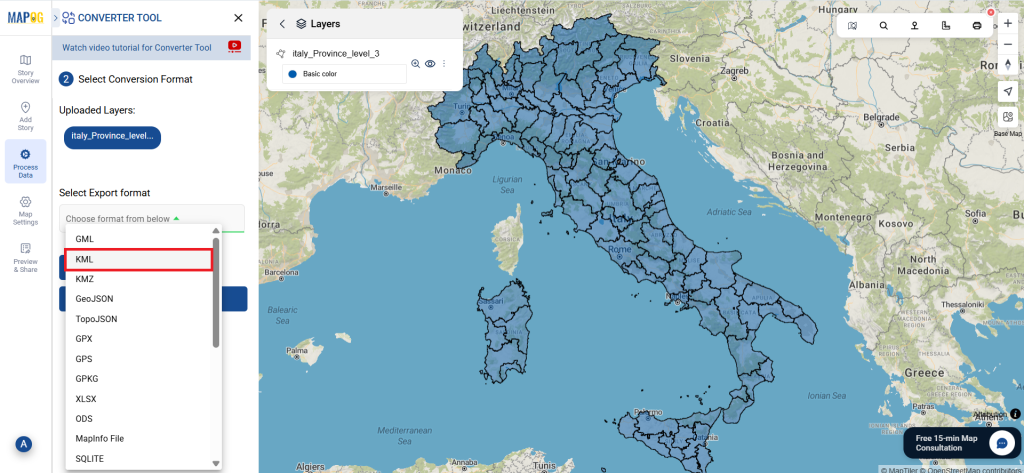
Next, select PDF as your desired output format. The tool offers various output options, but for this guide, we’ll focus on converting your file to PDF.

GPS to PDF

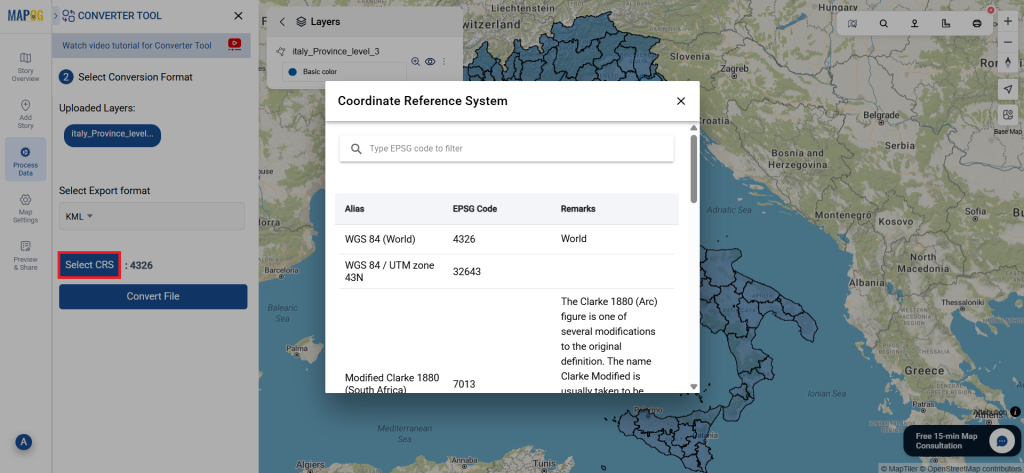
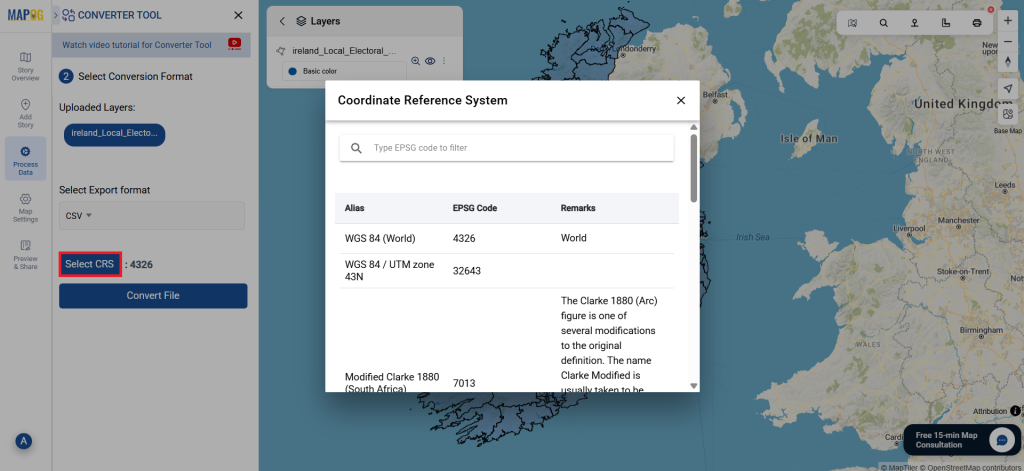
Additionally, this is a good time to set the CRS (Coordinate Reference System) to ensure your data aligns correctly with your spatial analysis requirements.

GPS to PDF
Step 3: Execute the Conversion

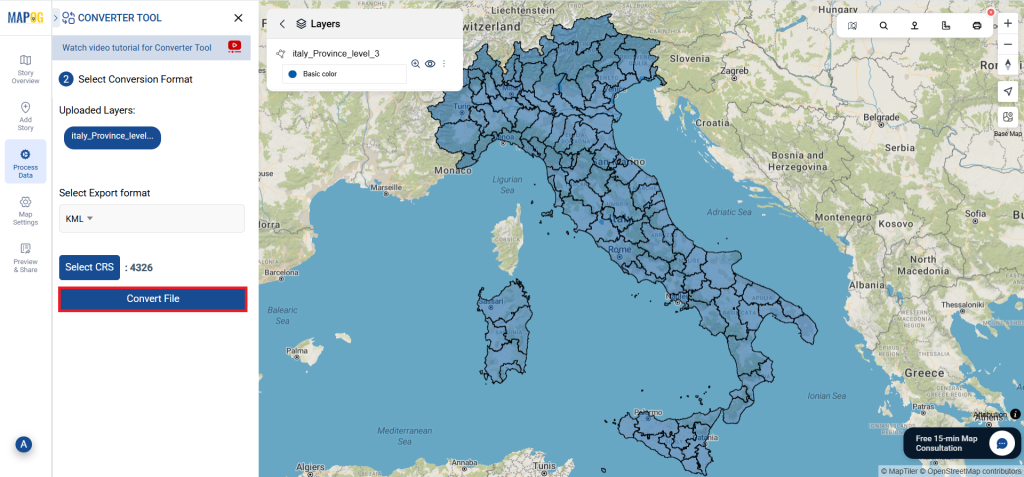
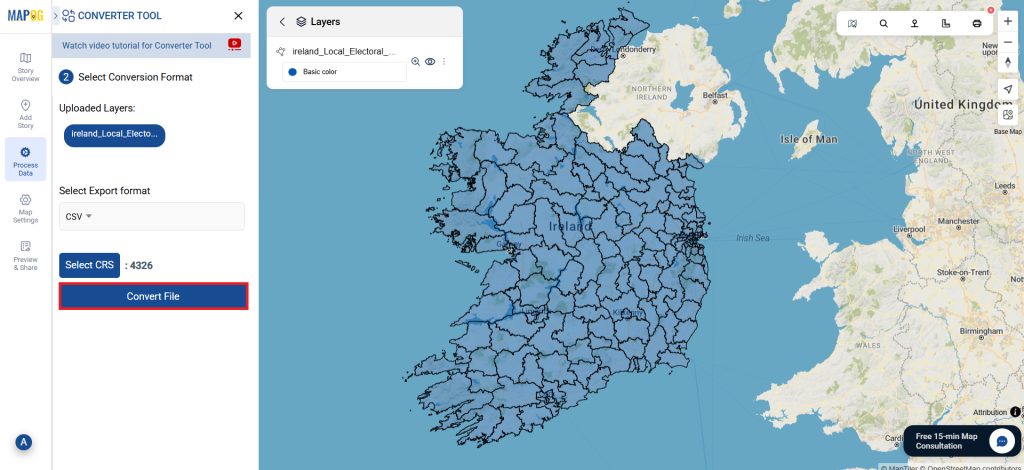
After setting up your data and selecting the appropriate format, click on ‘Convert Files’ to begin the conversion. The Converter Tool will seamlessly transform your GPS data into a PDF file.

GPS to PDF
Step 4: Review and Download Your PDF

Finally, take a moment to review your converted PDF file to ensure all data has been accurately transferred. Once satisfied, download the file. This final review step is crucial to confirm that the conversion was successful and that your data remains intact.

GPS to PDF
Step 5: Create Grid

You can create Grid around the stations. Just click on the action button of new converted file, and select create grid tool. Then select your layer, provide range and submit!

GPS to PDF

And there you have it! You’ve successfully used the MAPOG Map Analysis Converter Tool to convert your GPS files into PDFs. This feature simplifies the process of handling various data formats, making your workflow smoother and more efficient, ready for any analysis you might need.

MAPOG map analysis has a lot of feature tool. These feature tools allow us to perform a variety of tasks. For example, you can create buffer zones using Buffer Tool, style your numeric data with the quantity style tool, create isochrones on your map using Isochrone tool, and more.

Here are some other blogs you might be interested in:

Convert GIS Data Online : KML to CSV Step by Step Guide
Easily transform your KML data into CSV format using MAPOG, simplifying your geographic data processing for improved spatial analysis.

Converting KML data to CSV offers a straightforward approach to analyze, share, and integrate geographical information across various platforms. Whether you’re new to the process or experienced, this guide will walk you through the steps seamlessly.

Converting KML to CSV with MAPOG

Converting KML to CSV with MAPOG

Key Concept of File Conversion MAPOG’s Converter Tool facilitates effortless transformation between different data formats. By inputting data in one format, the tool converts it into the required format for analysis, enhancing flexibility and adaptability across applications.

Steps to Convert KML to CSV with MAPOG

Step 1: Upload the Data

Access the Converter Tool: Navigate to the “Process Data” menu and select “Converter Tool.”

Upload the Data
Upload the Data


Upload KML File: Begin by uploading the KML file you wish to convert.

Upload KML File
Upload KML File

Step 2: Select the Output Format

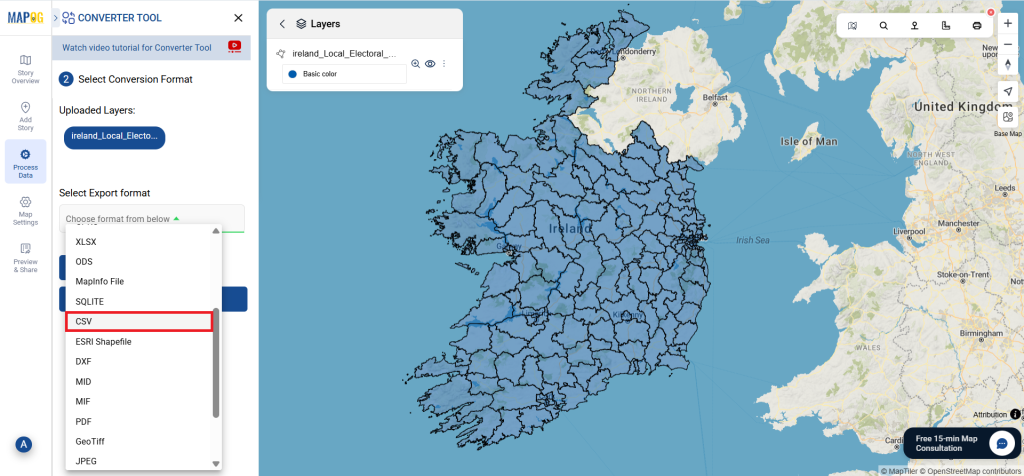
Choose the Output File Format: Opt for CSV as the output format.

Select the Output Format-Converting KML to CSV with MAPOG
Select the Output Format


Set the CRS (Coordinate Reference System): Optionally, set the CRS to align data accurately with spatial analysis requirements.

Set the CRS (Coordinate Reference System)

Step 3: Run the Conversion

Initiate the Conversion Process: Click on ‘Convert‘ to start the conversion process.

 Run the Conversion-Converting KML to CSV with MAPOG
Run the Conversion

Step 4: Review and Download

Review the Converted Data: Verify the converted CSV data for accuracy.

Review and Download
Review and Download

Download the Converted File: Upon satisfaction, download the converted CSV file.

Conclusion

By utilizing MAPOG’s Converter Tool, you’ve efficiently converted your KML files to CSV, streamlining your workflow and enhancing data interoperability. For further assistance, feel free to reach out to us at support@mapog.com.

Convert GML to DXF GIS Data Online
In this guide, we’ll walk you through how to efficiently convert your GML files to DXF using the powerful Converter Tool in MAPOG Map Analysis. Whether you’re a beginner or an experienced user, Converting GML to DXF with MAPOG, this tutorial will help you understand the process in easy steps.

Key Concept to Converting files

The Converter Tool is a feature in MAPOG Map Analysis that helps you change your data from one format to another. It’s like magic! You give it your data in one form, and it transforms it into another form that you need for your analysis. Additionally, with GIS Data, you can download data in any format, making it versatile and adaptable for various applications.

Converting GML to DXF

Step 1: Upload the Data

1. Click on the “Process Data” menu and choose the “Converter Tool” option.

GML to DXF

2. Upload your GML file. This is your starting point where you provide the data that needs conversion.

GML to DXF
Step 2: Select the Format for Conversion

1. Choose the output file format as DXF. The tool offers various formats, but for this guide, we are focusing on converting to DXF.

GML to DXF

2.You can also set the CRS at this stage.

GML to DXF
Step 3: Run the Conversion

Click ‘Convert’ and let the tool work its magic. The Converter Tool processes your data, transforming it from GML to DXF format.

GML to DXF
Step 4: Review and Download

Finally, review your converted DXF data to ensure it looks right. Once satisfied, download the converted file. This step is crucial to verify that the conversion has been successful and the data integrity is maintained.

GML to DXF

And there you have it! You’ve successfully used the Converter Tool in MAPOG Map Analysis to convert your GML Files to DXF. Now you can easily convert your data for all your analysis needs. This feature simplifies the process of handling different data formats, making your workflow more efficient and effective.

Convert GIS Data ONLINE KMZ to XLSX

In this guide, we’ll walk you through how to efficiently convert your KMZ files to XLSX using the powerful Converter Tool in MAPOG Map Analysis. Whether you’re a beginner or an experienced user, Converting KMZ to XLSX with MAPOG, this tutorial will help you understand the process in easy steps.

Key Concept of Converting files

The Converter Tool is a feature in MAPOG Map Analysis that helps you change your data from one format to another. It’s like magic! You give it your data in one form, and it transforms it into another form that you need for your analysis. Additionally, with GIS Data, you can download data in any format, making it versatile and adaptable for various applications.

Now, let’s walk through the simple steps of using the Converter Tool to Converting KMZ to XLSX with MAPOG.

Step 1: Upload the Data

1. Click on the “Process Data” menu and choose the “Converter Tool” option.

2.Upload your KMZ file. This is your starting point where you provide the data that needs conversion.

Step 2: Select the Format for Conversion

1.Choose the output file format as XLSX. The tool offers various formats, but for this guide, we are focusing on converting to XLSX.

2.You can also set the CRS at this stage.

Step 3: Run the Conversion

Click ‘Convert’ and let the tool work its magic. The Converter Tool processes your data, transforming it from KMZ to XLSX format.

Step 4: Review and Download

Finally, review your converted XLSX data to ensure it looks right. Once satisfied, download the converted file. This step is crucial to verify that the conversion has been successful and the data integrity is maintained.

And there you have it! You’ve successfully used the Converter Tool in MAPOG Map Analysis to convert your KMZ files to XLSX. Now you can easily convert your data for all your analysis needs. This feature simplifies the process of handling different data formats, making your workflow more efficient and effective.

Explore Our Other Blogs

  1. TopoJSON to KMZ
  2. GML to TopoJSON
  3. GML to GeoJSON
  4. KMZ to KML
  5. GML to KML
  6. GML to KMZ
  7. KMZ to GML
  8. TopoJSON to KML
  9. GeoJSON to CSV
  10. GeoJSON to TopoJSON
  11. TopoJSON to GML
  12. KMZ to MIF

Convert Online GML to MAPINFO : Step by Step Guide
In this guide, we’ll walk you through how to efficiently convert your GML files to MAPINFO using the powerful Converter Tool in MAPOG Map Analysis. Whether you’re a beginner or an experienced user, Converting GML to MAPINFO with MAPOG, this tutorial will help you understand the process in easy steps.

Key Concept to Converting files

The Converter Tool is a feature in MAPOG Map Analysis that helps you change your data from one format to another. It’s like magic! You give it your data in one form, and it transforms it into another form that you need for your analysis. Additionally, with GIS Data, you can download data in any format, making it versatile and adaptable for various applications.
Converting GML to MAPINFO

Step 1: Upload the Data

1. Click on the “Process Data” menu and choose the “Converter Tool” option.

GML to MAPINFO

2. Upload your GML file. This is your starting point where you provide the data that needs conversion.

GML to MAPINFO
Step 2: Select the Format for Conversion

1. Choose the output file format as MAPINFO. The tool offers various formats, but for this guide, we are focusing on converting to MAPINFO.

GML to MAPINFO

2.You can also set the CRS at this stage.

GML to MAPINFO
Step 3: Run the Conversion

Click ‘Convert’ and let the tool work its magic. The Converter Tool processes your data, transforming it from GML to MAPINFO format.

GML to MAPINFO
Step 4: Review and Download

Finally, review your converted MAPINFO data to ensure it looks right. Once satisfied, download the converted file. This step is crucial to verify that the conversion has been successful and the data integrity is maintained.

GML to MAPINFO

And there you have it! You’ve successfully used the Converter Tool in MAPOG Map Analysis to convert your GML Files to MAPINFO. Now you can easily convert your data for all your analysis needs. This feature simplifies the process of handling different data formats, making your workflow more efficient and effective.

Converting KML to SQLite Online

Effortlessly convert KML to SQLite with MAPOG to streamline your geographic data transformation for enhanced spatial analysis and interoperability.

Transforming your GIS data by converting KML to SQLite can simplify analysis, sharing, and integration into various GIS applications. Whether you’re a beginner or an experienced user, this tutorial will guide you through the process in easy steps.

Converting KML to SQLite with MAPOG

Key Concept of Converting Files

The Converter Tool in MAPOG Map Analysis allows you to change your data from one format to another effortlessly. You input your data in one form, and it transforms it into the required format for your analysis. This versatility enables you to download and use data in various formats, making it adaptable for different applications.

Steps to Convert KML to SQLite with MAPOG

Step 1: Upload the Data

Access the Converter Tool: Click on the “Process Data” menu and choose the “Converter Tool” option.

 Upload the Data
Upload the Data

Upload KML File: This is your starting point where you provide the data that needs conversion.

Upload Your KML File-Converting KML to SQLite with MAPOG
Upload Your KML File

Step 2: Select the Format for Conversion

Choose the Output File Format: Select SQLite as the output file format. The tool offers various formats, but for this guide, we focus on converting to SQLite.

Choose the Output File Format-Converting KML to SQLite with MAPOG
Choose the Output File Format

Set the CRS (Coordinate Reference System): You can also set the CRS at this stage to ensure your data aligns correctly with your spatial analysis requirements.

Set the CRS (Coordinate Reference System)

Step 3: Run the Conversion

Start the Conversion Process: Click ‘Convert’ and let the tool work its magic. The Converter Tool processes your data, transforming it from KML to SQLite format.

Start the Conversion Process-Converting KML to SQLite with MAPOG
Start the Conversion Process

Step 4: Review and Download

Review the Converted Data: Check your converted SQLite data to ensure it looks correct. This step is crucial to verify that the conversion has been successful and the data integrity is maintained.

Review and Download
Review and Download

Download the Converted File: Once satisfied, download the converted file.

Conclusion

And there you have it! You’ve successfully used the Converter Tool in MAPOG Map Analysis to convert your KML files to SQLite. This conversion simplifies the process of handling different data formats and makes your workflow more efficient and effective. For any queries, please contact us at support@mapog.com.

Convert KMZ to GPKG Online: A Step-by-Step Guide

KMZ to GPKG using MAPOG, you can transform gis data, making it easier to analyze, share, and integrate into various GIS applications.

In this guide, we’ll walk you through how to efficiently convert your KMZ files to GPKG using the powerful Converter Tool in MAPOG Map Analysis. Whether you’re a beginner or an experienced user, Converting KMZ to GPKG with MAPOG, this tutorial will help you understand the process in easy steps.

Key Concept of Converting files

The Converter Tool is a feature in MAPOG Map Analysis that helps you change your data from one format to another. It’s like magic! You give it your data in one form, and it transforms it into another form that you need for your analysis. Additionally, with GIS Data, you can download data in any format, making it versatile and adaptable for various applications.

Online KMZ to GPKG GIS Converter

Now, let’s walk through the simple steps of using the Converter Tool to Converting KMZ to GPKG with MAPOG.

Step 1: Upload the Data

1. Click on the “Process Data” menu and choose the “Converter Tool” option.

2.Upload your KMZ file. This is your starting point where you provide the data that needs conversion.

Step 2: Select the Format for Conversion

1.Choose the output file format as GPKG. The tool offers various formats, but for this guide, we are focusing on converting to GPKG.

2.You can also set the CRS at this stage.

Step 3: Run the Conversion

Click ‘Convert’ and let the tool work its magic. The Converter Tool processes your data, transforming it from KMZ to GPKG format.

Step 4: Review and Download

Finally, review your converted GPKG data to ensure it looks right. Once satisfied, download the converted file. This step is crucial to verify that the conversion has been successful and the data integrity is maintained.

And there you have it! You’ve successfully used the Converter Tool in MAPOG Map Analysis to convert your KMZ files to GPKG. Now you can easily convert your data for all your analysis needs. This feature simplifies the process of handling different data formats, making your workflow more efficient and effective.

Explore Our Other Blogs

  1. TopoJSON to KMZ
  2. GML to TopoJSON
  3. GML to GeoJSON
  4. KMZ to KML
  5. GML to KML
  6. GML to KMZ
  7. KMZ to GML
  8. TopoJSON to KML
  9. GeoJSON to CSV
  10. GeoJSON to TopoJSON
  11. TopoJSON to GML
  12. KMZ to MIF

Convert KMZ to GPX : A Step-by-Step Guide

In this guide, we’ll walk you through how to efficiently convert your KMZ files to GPX using the powerful Converter Tool in MAPOG Map Analysis. Whether you’re a beginner or an experienced user, Converting KMZ to GPX with MAPOG, this tutorial will help you understand the process in easy steps.

Key Concept of Converting files

The Converter Tool is a feature in MAPOG Map Analysis that helps you change your data from one format to another. It’s like magic! You give it your data in one form, and it transforms it into another form that you need for your analysis. Additionally, with GIS Data, you can download data in any format, making it versatile and adaptable for various applications.

Online KMZ to GPX GIS Converter

Now, let’s walk through the simple steps of using the Converter Tool to Converting KMZ to GPX with MAPOG.

Step 1: Upload the Data

1. Click on the “Process Data” menu and choose the “Converter Tool” option.

2.Upload your KMZ file. This is your starting point where you provide the data that needs conversion.

Step 2: Select the Format for Conversion

1.Choose the output file format as GPX. The tool offers various formats, but for this guide, we are focusing on converting to GPX.

2.You can also set the CRS at this stage.

Step 3: Run the Conversion

Click ‘Convert’ and let the tool work its magic. The Converter Tool processes your data, transforming it from KMZ to GPX format.

Step 4: Review and Download

Finally, review your converted GPX data to ensure it looks right. Once satisfied, download the converted file. This step is crucial to verify that the conversion has been successful and the data integrity is maintained.

And there you have it! You’ve successfully used the Converter Tool in MAPOG Map Analysis to convert your KMZ files to GPX. Now you can easily convert your data for all your analysis needs. This feature simplifies the process of handling different data formats, making your workflow more efficient and effective.

Explore Our Other Blogs

  1. TopoJSON to KMZ
  2. GML to TopoJSON
  3. GML to GeoJSON
  4. KMZ to KML
  5. GML to KML
  6. GML to KMZ
  7. KMZ to GML
  8. TopoJSON to KML
  9. GeoJSON to CSV
  10. GeoJSON to TopoJSON
  11. TopoJSON to GML
  12. KMZ to MIF