Blog

Download Free Shapefile Maps – Country Boundary Polygon, Rail-Road, Water polyline etc

Download Free Shapefile Maps – Shapefile is one of the most common and extensively use vector file format of GIS (Geographical Information System), developed by ESRI as an open Specification, which consist of collection of files viz .shp, .shx and .dbf extension with same prefix name. You might be hunting to Download free shapefile for completing either your small industrial work for POC or for academic project use or for any NGO work.

Download GIS Data From Here

Here you will find the links of best resources to Download Shapefile for free, either its polygon, polyline and point feature shapefile, covering different subjects like Administrative Area Boundaries, Roads, Railways, population etc across the world. You may also look to download Digital Terrain DEM.

Download Free Shapefile Maps - different sources

Note: The Data Shapefile Downloaded from provided below link here, may or may not be authentic, accurate or incomplete. To check data correctness and accuracy, you need to research and recheck before using it. Also Shapefiles are downloaded for free from different organization or websites link and should be used according to
their respective terms and conditions, so please read T&C before using it for any purpose.

Download GIS Data From Here

Shapefile download link

  1. World Country Shapefile
  2.  Australia Shapefile download
  3. Argentina
  4. Brazil
  5. Download Shapefile of Canada
  6. Denmark
  7. Fiji
  8. Germany
  9. India
  10. Indonesia
  11. Japan
  12. Kenya
  13. Lebanon
  14. Madagascar
  15. Malaysia Shapefile
  16. Mexico Shapefile
  17. Mongolia
  18. New Zealand
  19. Netherland
  20. Nigeria
  21. Papua New Guinea
  22. Philippines
  23. Poland
  24. Singapore
  25. South Africa Province Shapefile
  26. South Korea
  27. Tunisia
  28. United Kingdom Shapefile
  29. Download Shapefile of United States of America
  30. Vietnam

Download GIS Data of other states of the USA

If you are looking for any shapefile of country which is not listed above please comment below so that we can search in our pitara of shapefile. If we found we can upload it on the same.

Download Free Shapefile Maps – Country Boundary Polygon, Rail-Road, Water polyline etc

1.) Diva GIS

Website is developed by Robert Hijmans, which provides free Shapefile to download, covering around 244 countries. You can directly select the country and category of shapefile and press on OK button to start download. Subject Category option you will find here are Administrative Areas (Boundaries), Inland Water, Roads, RailRoads, Elevation, Land cover, population, Climate  and Gazetteer.

2.) GADM :

GADM is a spatial database of Global Administrative Areas, which covers all countries data defining boundaries such as provinces, taluk, departments, counties, krong etc. GADM listed around 253 countries currently, the different files formats are available along with shapefile such as Esri File Geodatabase, Geopackage(Spatial Lite), R(Spatial Polygon Dataframes), Google Earth .kmz and ESRI personal geodatabase. The coordinate reference system of each file is in longitude/latitude and the datum is WGS84.

3.) Natural Earth Data:

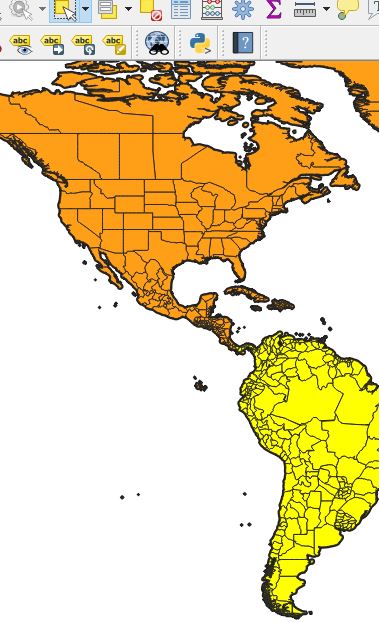
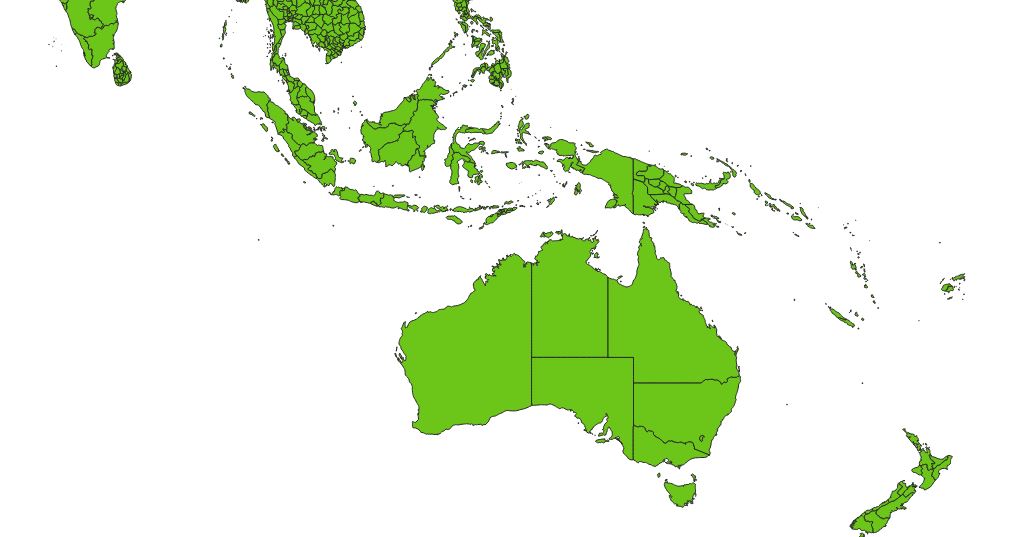
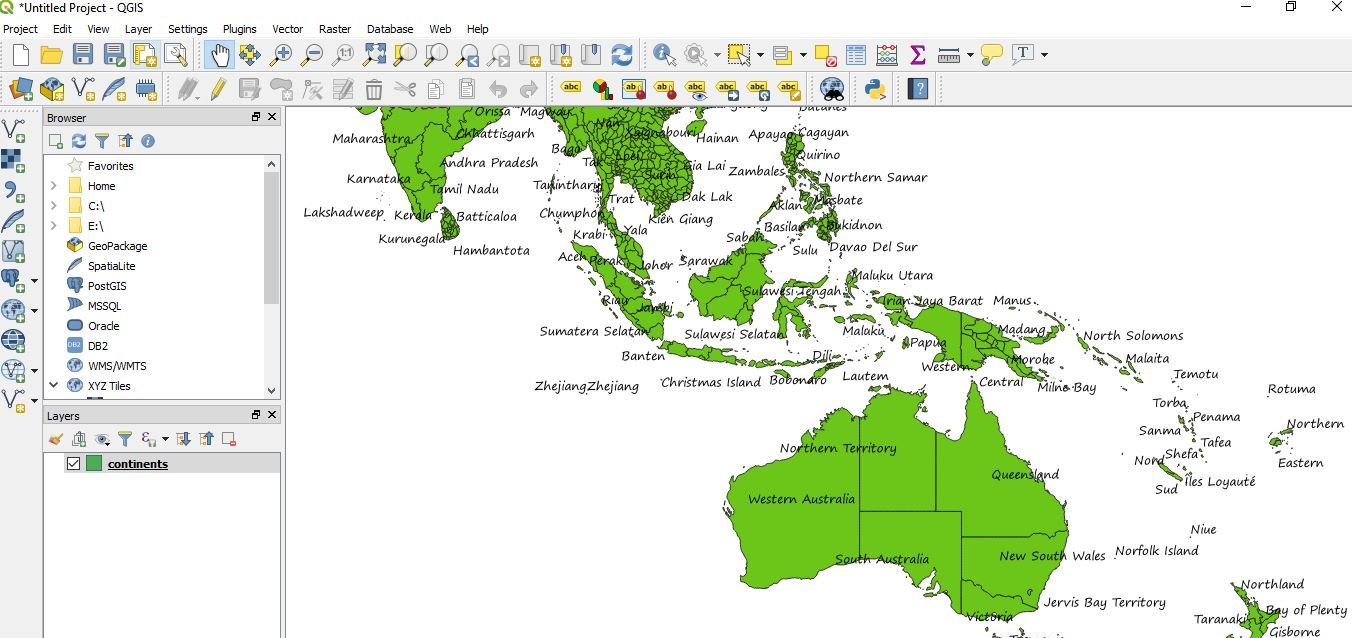
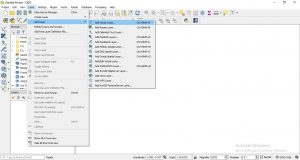
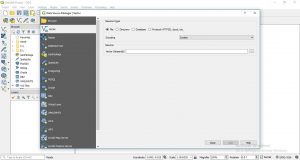
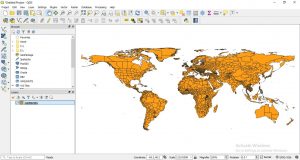
“Natural Earth is a public Domain Map data-set available at at 1:10m(Large scale data), 1:50m(medium scale data), and 1:110 million scales (Small Scale data).” Cultural, physical and raster category data can be downloaded from each scale. Data can be downloaded as shapefile (shp) or GeoDB or as SQLite. Natural Earth is maintained by Nathaneiel V. KELSO and Tom Patterson. Here is the screenshot of shapefile from QGIS (Quantum GIS) tool of 1:10m all shapefile layers uploaded at once.

Download Free Shapefile Maps
QGIS View – Download Free Shapefile Maps

4.) Geofabrik:

Geofabrik provides the current data from the Openstreetmap database, which is available either for free as well as premium shapefiles. Data can be downloaded as .osm and .shp.zip file. Select the continent from the link provided for which you need to download the data. Further you can either select the country for filtering out more and hit the .shp.zip link to download the data.

5.) Open Street Map data

This service is created by Jochen Topf and Christoph Hormann. Following data sets and its subcategories shapefiles can be downloaded from this website.
a.) Coastline Data processing: It covers land polygons of the world area i.e continents and islands, Water polygon i.e polygon for ocean, seas and other water bodies and coastlines as line strings.
b.) Generalized data sets: This section provides you to download Generalized coastline polygon shapefiles.
c.) Antarctic icesheet: Antarctic icesheet polygons and icesheet outlines can be obtained from here.

6.) Gis-Lab info:

World data shapefile can be downloaded from GIS lab. This global data are separated into 4 parts i.e Eur, Noa, Soa and Sas Zones, which you can see the image provided below. This data shapefile is in zipped with 7z compressor and all data are in Latitude / Longitude and WGS84 coordinate system.

Select different zone to Download Free Shapefile Maps

7.) MapCruzin:

While the website does not look user friendly, you need to hunt over different country shapefiles at different area. Both free as well as paid Shapefile can be obtained and downloaded given.

8.) Sedac data:

SocioEconomic Data and Applications Center provides data as zipfile of ESRI File geodatabases or shapefiles, and have decimal degree geographic coordinates system with datum WGS84 (world Geodetic System spheroid of 1984). Continent based regional data is available as shown below. Before downloading the data, you need to register and sign in to their system.

Continent Based data - Download Free Shapefile
Continent Based data – Download Free Shapefile

9.) Marine Regions:

If you are working on Sea or marine related subject, this website may help you to get the direct data to link to the relevant website from which you can get the shapefile maps data.

It might be possible that the data which you might have downloaded from website provided here, can be of different format which was not required. For this, you can refer to following articles where you can convert different GIS data format to any of it.

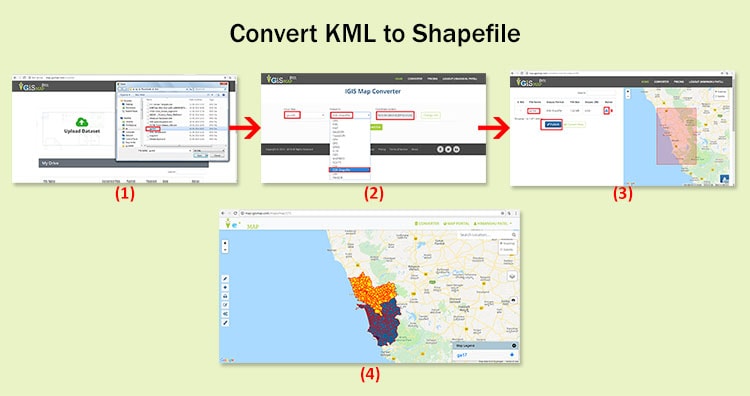
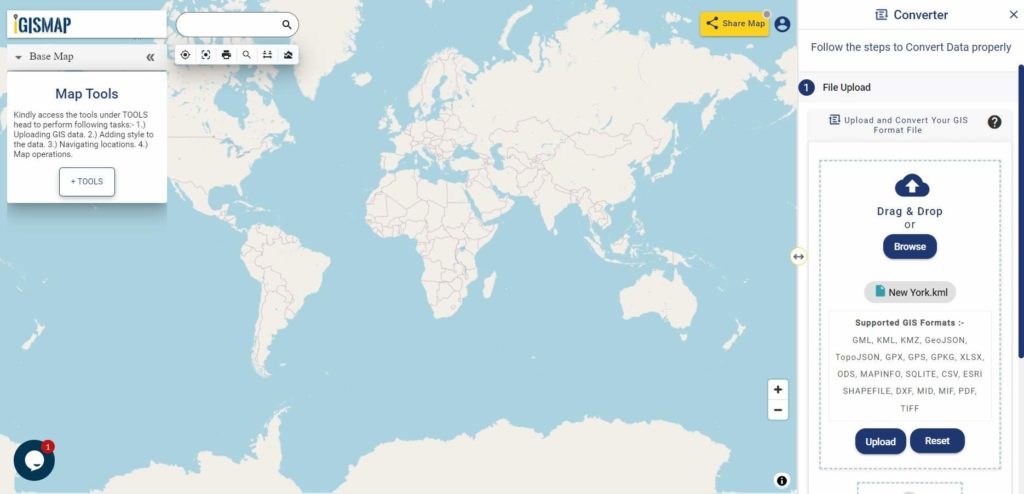
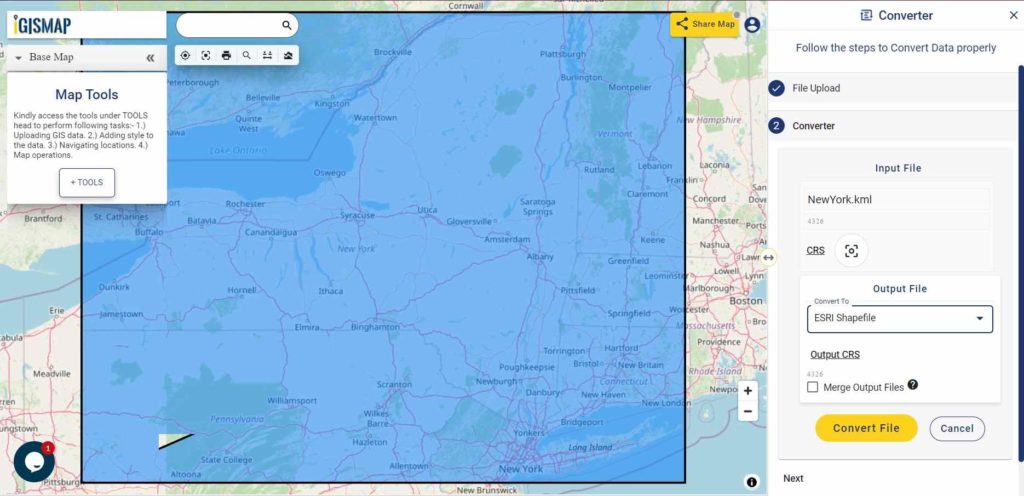
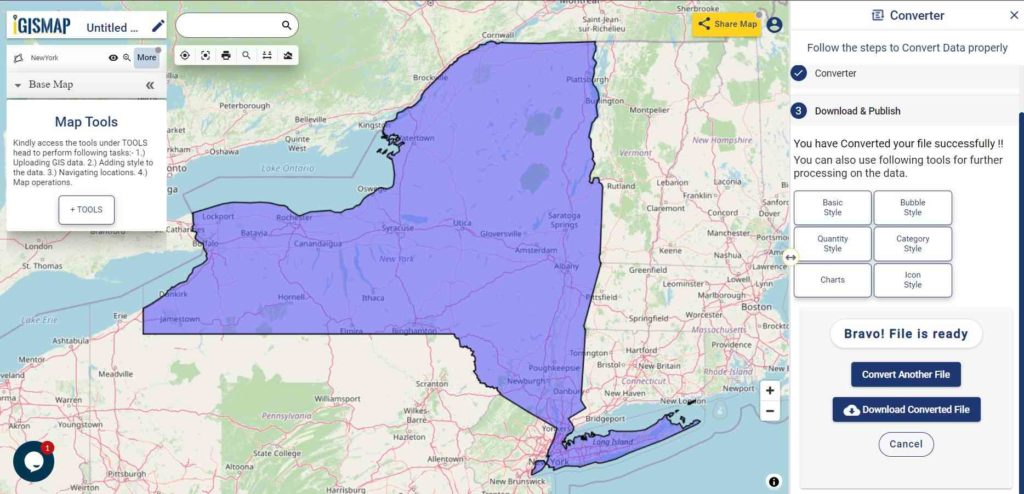
Convert KML to shapefile

Convert Shapefile to KML

Convert Shapefile to GeoJSON

Convert GeoJSON to topojson

Merging two or more than two Shapefile

You may also find these links which makes you to download free shapefile map for particular region:

Is the above provided links are not fulfilling your need. Than the best option you can opt for is to create your own shapefile with the help of QGIS and openstreetmap. You can easily download the data from their and then edit it make it more clear according to your requirement. If you are new to QGIS then let me provide you some tutorial link which helps you to digitize the OSM data and create shapefile.

For what purpose you need to download shapefiles? Which project you are working on? Which website you to get the map data? Do share your valuable thoughts by commenting below. I hope that the above list have definitely helped you in finding the right website to get free shapefile download, while their might be possibilities that I have not listed some of the website which should be present in the list. Please help us by providing those links by commenting below.

Google Map track Near By Gas Station and Current Prices – Android and iOS App

Are you running short of fuel at unknown place, while traveling form A to B? Wanted to track Near By Gas Station when there is no one to ask? Well, Google cares about your problem and so, they rolled out Android and iOS Google Map app update to locate Near By Gas Station along with other nearby search point of interest location.

Track Near by gas station and price on Google Map App

The only requirement to search for Gas Station is to have Google Map app in your device and a internet connection or if you have an offline area saved, then their is no need to have an internet connection too. Just grab your mobile open up Google Map and type “Gas Station” in the search box provided, which results out the near by Gas Station to you on the Map with red indicators as seen below. You can also increase the search area by providing the city name followed by ‘gas station’ keyword for example ‘San Francisco gas stations’.

Google Map track Near By Gas Station and Current Prices - Android and iOS App

Not only this, but Google Map would also try to help you in providing current rate of Different Gas Station in real time, which will definitely helps you to save some bucks comparing prices and lets you decide where you should fill your vehicle tank.

If you are in navigating mode, then the user can tap on a search icon, then select the gas stations from the drop down menu list which also includes coffee shops, restaurants and grocery stores as indicated by official blog for Google Maps.

Google Map track Near By Gas Station and Current Prices - Android and iOS App
Google Map track Near By Gas Station and Current Prices – Android and iOS Appne

This feature will really helps in real time while on a trip, in finding Gas stations when you notice your vehicle gas tank indicating nearing empty. What you think about this Google Map Features? Are you travelling regularly and finding the way to find near by Gas Stations? Is this feature helpful for you? Do share your valuable thoughts by commenting below in the space provided.

Send Place location from Desktop Google Map to Android or iOS Google Map App

Sharing location is pretty easy in Google Maps, while Google also provided a method to directly send a location from Google Map Desktop user to the Android Mobile or iOS mobile device of Same user with pressing just one click on “SEND TO YOUR PHONE” option. Many times you might have searched the location or route on Desktop when planning for travel and then switch back to look on your mobile device while actually travelling.

Send Place location from Desktop Google Map to Android or iOS Google Map App

The place latitude longitude along with name will be received as a notification which directly open up in the Google map pointing to that location. Lets explore sending location form Desktop Google Map to Mobile App Google Map.

Looking for other features of Google Map:

Steps to Send Location from Laptop or Desktop Google Map to Android or iOS Google Map App:

1.) Open Google Map in Browser. Check whether the Google Map is not in Lite Mode, or otherwise switch back to full mode from Lite, as the option will not be available in Lite Mode.

2.) Sign in to the Map with your Gmail ID and Search the location which you want to send to yourself.

3.) You can find the details of the location with options to Save the location, find nearby point of interest, send and share. Select “Send to Your mobile” option and select one of your Android or iOS listed phone to which you want to send the notification, with which your Gmail Account is associated.

Send Place location from Desktop Google Map to Android or iOS Google Map App

4.) Once Selected, Google Map will send the location notification to your device without any delay.

Send Place location from Desktop Google Map to Android or iOS Google Map App

5.) As you click on notification info, it will directly open up Google Map, pointing to the location which you have send.

Getting problem, Lets troubleshoot it to Send Place location to Google Map App:

a.) Either your Android device or iPhone Device should be signed with the same Google Account, with which you are trying from Google Map browser.
b.) May be your mobile device internet is not working, test it.
c.) If you are using iPhone or iPad, follow this steps to give notification permission:

i.) Go to device setting and touch notification.
ii.) Scroll to Google Maps and switch on Allow notification.

You may also find send location to device from Apple Map, which may send the location data to Apple iPhone or iPad mobile device.

What you think about the Google Map Send to Your Phone option. How many times you have used this features? Are you getting problem in following above steps? Do comment below to share your thoughts.

Download Save Offline Google Map on app – Android and iOS

Download Save Offline Google Map on app. Map helps you to navigate and find the nearest point of Interest location when you are travelling and at unknown place. While Network service provider doesn’t guarantee you to provide full Network at each and every places you visit, which results in either no or slow internet. Keeping that in mind Google rolled out Offline Map to their user, by letting them to save and download a part of area into their device. This will not only solve the above stated problem but would surely going to help you save mobile data.

Download Save Offline Google Map

Google updated this feature in Mid 2015 for Android Application and in December 2015 for iOS application, which lets users to see live map offline. You may also see now the near by Gas station on Map. Both Search and direction Navigation feature would be supported even after having no internet connection if the Location Map area is downloaded. Below are the steps to know how to download offline Google Map in Android and iOS user.

You may also be interested to see following Google Map tips:

Download Save Offline Google Map on app – Android and iOS

1.) Open Google Map Application.

2.) If not signed in, then log in to the application. Click on mobile navigation button, to open up side bar.

3.) Check Offline area in the slidder. If offline Area option is not found, then click on Your Places and scroll down to bottom where it says to download the map area.

Download Save Offline Google Map

4.) Choose the area and click on download button to save the viewable area of Map. Enter the name of the Offline Map.

Download Save Offline Google Map

Note: You cannot select too large area. If you are attempting to do so, then app will ask you to further zoom in to reduce the area.

5.) Let download to get finished. You can see your offline map at “Your Places” option or at “Offline Area” option.

Once downloaded, you can view the saved area of map without internet connection.

Download Save Offline Google Map  – Some Important points to keep in Mind

Following are some conditions which you need to keep in mind while downloading and using Google Map offline:

  • The biggest size which can be downloaded for an offline area is 120,000 square kilometer. This area is more than enough to acquire a single city.
  • Downloading offline area may not be available in some area or region due to some limitation as per Google.
  • Data downloaded will be expired after 30 days
  • Offline area is free to download, but your mobile data charges will apply.

You would get the options to rename, update or delete the offline Map saved, at “Your location” or “Offline Area” Panel. What you think about this Offline Google Map feature? Do comment below with your views.

Image Classification in QGIS – Supervised and Unsupervised classification

Image Classification in QGIS: Image classification is one of the most important tasks in image processing and analysis. It is used to analyze land use and land cover classes. With the help of remote sensing we get satellite images such as landsat satellite images. But these images are not enough to analyze, we need to do some processing on them. So to use these images for analysis we need image classification. In this post we will see how to download a Landsat satellite image and image classification in QGIS.

There are many software tools available for image classification such as ArcGIS, ERDAS IMAGIN, but these are not open source software. QGIS(Quantum GIS) is very powerful and useful open source software for image classification. QGIS 3.2.1 for beginners

The basic requirement for image classification is image itself but the other important thing is knowledge of the region for which we are going to classify the image.  For this either you need to do manual survey or else you can use google earth. Definitely Manual survey leads to better result.

There are two types of image classification methods..

  1. Supervised classification
  2. Unsupervised classification

Unsupervised classification is not preferred because results are completely based on software’s knowledge of recognizing the pixel. For unsupervised classification you can use KMeansclassification. In this post we will see Supervised classification only.

Download the Sample Image data for classification

Let us see how to download a satellite image first to take out sample image. One of the source is Earth Explorer  and register. If you already have an account then sign in.

Note: Please read terms and condition and usages of data.

Image classification in QGIS

Here you will see search criteria tab on your left hand side, select it. Enter date and month in the options provided, so that if you want to download image for specific season we can get that image. In rainy season cloud cover is more so it is recommended that we download a image free from cloud cover and mostly of summer of winter season to yield good results.

After zooming in to the location of interest on map click on data sets. And then search for landsat archive. Expand landsat archive option. Depending on our criteria of image we can select more than one option here. We can also set additional criteria based on our requirement.

After setting the criteria click on results. It may take some time to get the results.

Image classification in QGIS

Now analyze the results available on your screen. There are some options given for our convenience. Click on show browse overlay and check if your location comes within the image or not. An image on your screen will appear. It will take some time to display depending on your internet speed as shown below in image.

Image classification in QGIS

When you find image of your choice click on download button. Click on the download button of the file which have largest size. Don’t download other data. The download file in the folder is with extension .tar. extract that file and you will get a folder containing all the images and a text document.

Image classification in QGIS

You can see there are 12 images and one MTL text document. This text file is very necessary if this file is not downloaded then image classification will not be possible. We need only 7 images B1 to B7 for image classification, however we can use all the images but it will be very bulky for QGIS to handle and as you start image classification you will understand why we have used 7 images only. You may also consider to look more tutorial on QGIS.

Image Classification in QGIS :

1.) Now open QGIS and install SEMI AUTOMATIC CLASSIFICATION plug-in from the plugin option. After installation of the plugin if toolbox on the screen of the same is not showing by default then, then click view and click panels. And Check both the panels SCP: ROI creation and SCP: classification.

Image classification in QGIS

2.) Now click toolbar and activate SCP toolbar.

Image classification in QGIS3.) Your Desktop QGIS screen will look like this below image.

Image classification in QGIS

4.) Now Click on pre-processing tool and Select the folder in which all the images and MTL file is present.

5.) Check these two options i.e Apply DOS1 Atmospheric Correction and  Create Virtual Raster as shown below.

Image classification in QGIS

6.) Now click on perform conversion. The processing may take too much time. Be patient

Image classification in QGIS

7.) All the images are loaded into Layers and virtual raster with name landsat.vrt is also created.

Image classification in QGIS

8.) We can remove image 8,9, 10 and 11. Click on band set icon and select all raster.

Image classification in QGIS

9.) Add rasters to band set.

Image classification in QGIS

10.) Select landsat 8 only because we have downloaded a landsat 8 image.

Image classification in QGIS

11.) Observe the changes in center wavelength.

Image classification in QGIS

12.) Click close. Now Right click on landsat virtual raster and click properties.

Image classification in QGIS

 13.) Switch to style tab.

Image classification in QGIS

14.) Change the band set as shown in the image.

Image classification in QGIS

15.) Click apply and observe the changes in the image.

Image classification in QGIS

16.) You can set band set as per your convenience. Set the band set such that you can easily identify land cover and land use classes. For this example we are selecting the above band set. You may also set band set by zooming into your desired location and then load current value of canvas and then click apply. We can do this until we get proper colour for our image.

Image classification in QGIS

17.) Now in SCP: ROI creation panel click on new shp. ROI means Region of Interest.

Image classification in QGIS

18.) Create a shape file in the same folder with name roi or as per your wish. Click on ‘+’ sign and then Click on create a ROI.

Image classification in QGIS

19.) Now as per your knowledge of the location zoom in and create a polygon. We are creating polygon because it will take pixels of same colour with slightly difference in the value. Right click to end the polygon.

Image classification in QGIS

20.) Give Macroclass name and class name.

Image classification in QGIS

21.) Click on save ROI and check add sigg. List.

Image classification in QGIS

22.) The roi is added to the signature list.

Image classification in QGIS

23.) Save this signature list in the same folder, and create new ROI’s for different classes. You can also change the color. Within same class you can have different Macroclass so that you can classify precisely. You can see the color convention for classes that are used generally on internet.

Image classification in QGIS

24.) Save all the roi. Select algorithm for classification.

Image classification in QGIS

25.) Before going for classification you can see a preview with the option provided as classification preview. Now Click on the plus sign and click on the area where you want to see the preview.

Image classification in QGIS

26.) Take a look at the preview. If this is the output you want you can go for final classification or you can make other ROI. Click on perform classification for final classification. This process will take time for classification. After the classification is done. Click on post processing tool icon and generate classification report.

Image classification in QGIS

Explore this plugin for more option. You will have a good classified image after practicing. Hope this tutorial helps you to explore the tool for classification with the help of QGIS software. If you want to share or have doubts or facing difficulty in implementing the steps, do comment below in the space provided below.

More on QGIS:

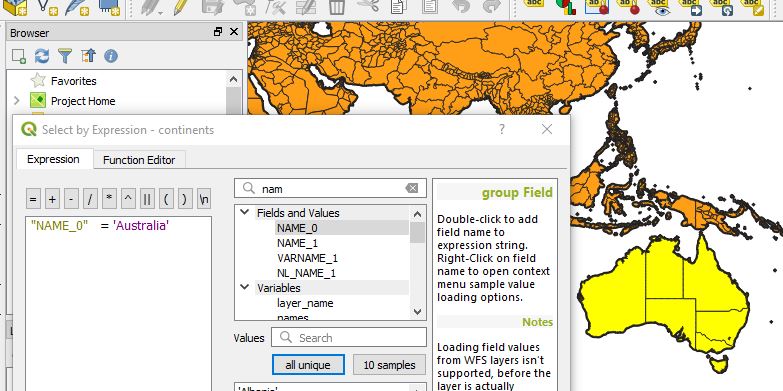
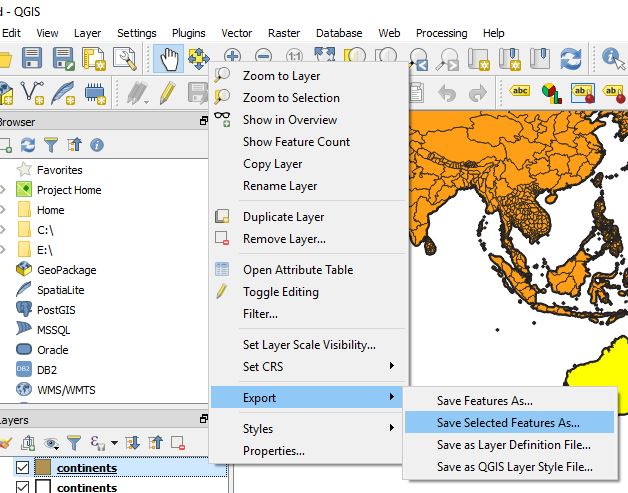
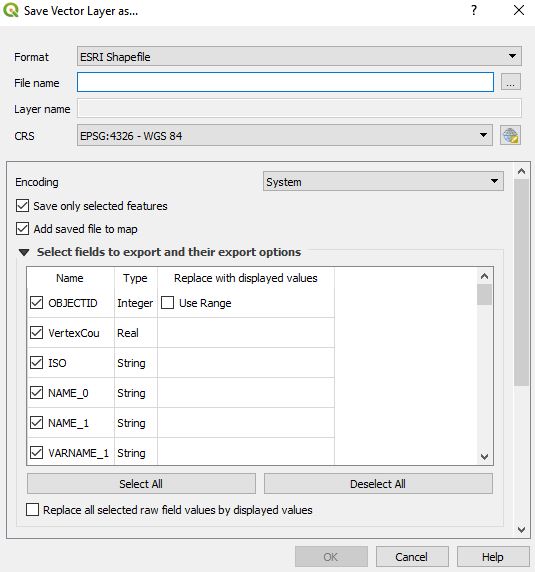
Export and Select features of layer using QGIS

Layer labeling in QGIS

Georeference a map with the help of another georeferenced map

Here we will see how to georeference a map with the help of another georeferenced map in QGIS (Quantum GIS). Georeference is a process to associate geographic location coordinates to any kind of physical object which is physically present over a Raster image map or to a physical map, with help of other georeferenced data or with know location coordinates of some points of image which is effectively called as control points. It is one of the important concept of GIS (Geographical Information System). We have already discussed about how to Georeference Map with the help of know control points.

New to QGIS – Check other tutorial in QGIS.

Georeference a map with the help of another georeferenced map:

1.) Open QGIS and Load the georeferenced map, by selecting Layer -> Add Layer -> Add Raster Layer or by directly selecting Add Raster Layer from Layer panel as shown below.

Georeference a map with the help of another georeferenced map

2.) After loading the file, from the menu select Raster and click on Georeferencer to select Georeferencer.

Georeference a map with the help of another georeferenced map

3.) In the Georeferencer window which is open up by above step, select Add Raster Layer icon to load non georeference map.

Georeference a map with the help of another georeferenced map

4.) Click add point and select a point on your map. In the pop up window click from map canvas.

Georeference a map with the help of another georeferenced map

Georeference a map with the help of another georeferenced map

5.) Select location in the georeferenced map same as the location you selected in non-georeferenced map. You will see it will load the coordinates.

Georeference a map with the help of another georeferenced map

6.) Click ok.

7.) Likewise select at least four points in different direction. Click transformation setting icon button as shown below in image.

Georeference a map with the help of another georeferenced map

8.) Select any one Transformation Type and provide your output raster name.

Georeference a map with the help of another georeferenced map

9.) Click start Georeferencing button from the Georeferencer window.

Georeference a map with the help of another georeferenced map

10.) Select CRS same as the georeferenced map. In our case it is WGS 84. Close georeferencer. You will see georeferenced image in canvas. Note the coordinates.

Georeference a map with the help of another georeferenced map

I hope this article would be helpful for you to know the basics of how to georeference raster image with the help of another georeferenced map. If you are facing problem in implementing the process do comment below, so that we can discuss over it.

You May Like :

Geo – Referencing raster image in QGIS w.r.t. vector file

Raster Data File Formats


Different ways to convert Shapefile to GeoJSON – Online or Offline or API

Convert Shapefile to GeoJSON. Shapefile, ESRI made a standard vector file format which is largely adopted in the field of GIS by programmers and geographers . While GeoJSON is also an open standard format designed for Web which largely supported with GIS JavaScript API, other programming API and with GIS (Geographic Information System) software tools too, for easily rendering. GeoJSON is based on JavaScript Object Notation. Here we will explore different methods to convert the files online, or offline or with the help of API which programmers can make use of.

Convert shapefile to geojson

You may be interested to refer following articles:

Different ways to convert Shapefile to GeoJSON

I.) Online Method : Convert Shapefile to GeoJSON:

The simplest and fast way to access the internet is through the online method, as you don’t need to install and configure any tool on your PC. Just drag the Shapefile files, one click on button and convert to GeoJSON. There are many website which provides the tool to convert the files by browsing them to server side and convert and also some client side conversion too. Lets explore the list, which is only client side as client side conversion will secure your file and doesn’t take your data pack for uploading the file:

A.) MAPOG Converter Tool :

IGIS Map tool is one stop solution for all GIS data analysis and conversion.

 Shapefile to Geojson Conversion

  •  Go to the tool MapOG Converter Tool.
  •  If you are already registered then login otherwise sign up.
  • Once get register tap on Converter Button Shown in figure.

Convert shapefile to geojson

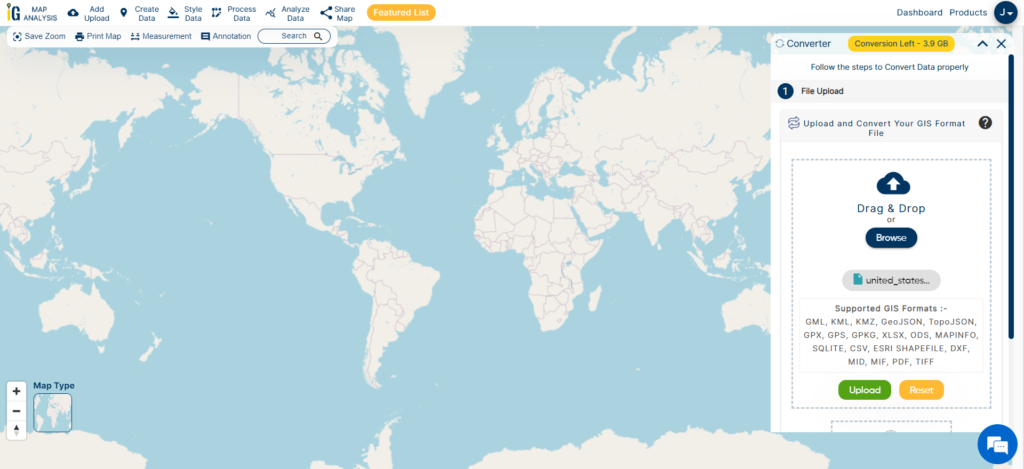
  • Upload the Shapefile from data set or Google Drive or Drop Box or already added in drive then choose the file. Lets we want to convert already uploaded file from My Drive then select the file.

Convert shapefile to geojson

  • Tap the file and new window will appear shown below.

Convert shapefile to geojson

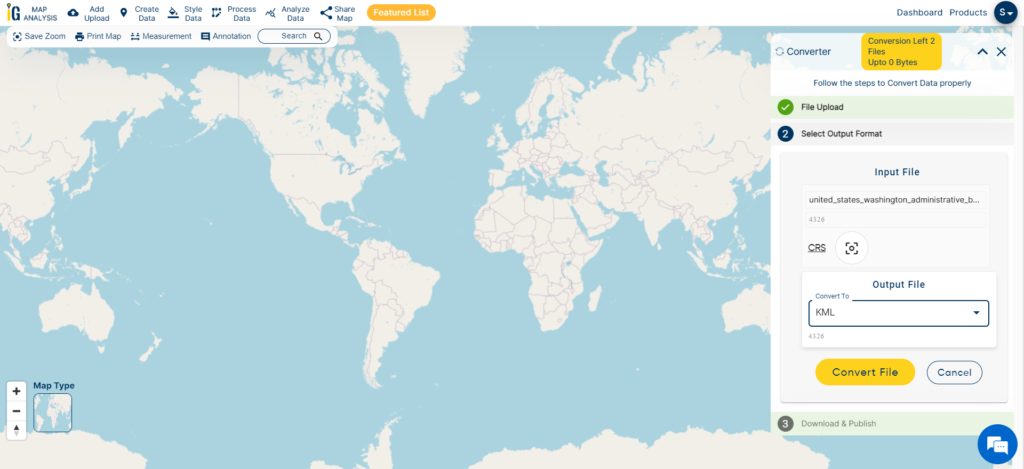
  • Select the desired Output in our case choose Geojson. You can also change CRS. Now tap on Convert file button.

Convert shapefile to geojson

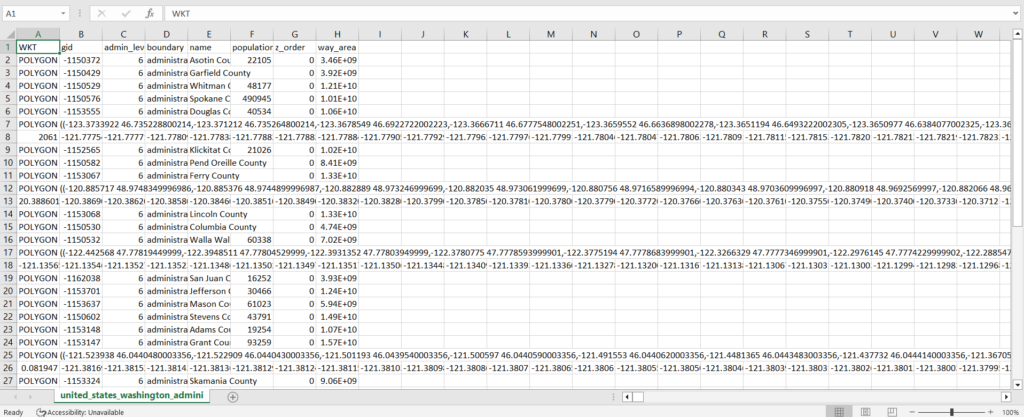
  • It will so the table in the next step. You can directly download the converted file or you can check it through clicking on publish button.

Convert shapefile to geojson

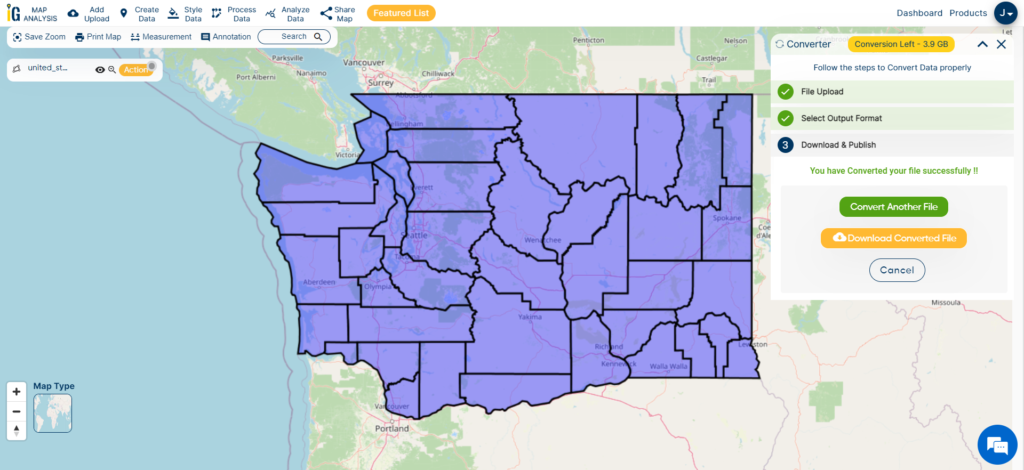
  • Below is the screen of published Geojson file.

Convert shapefile to geojson

Whole process is same from new uploaded file from data set or from google drive or from drop box. If you face any problem ping us at website.

You might be interested in Query on Geojson data file then try our tool IGIS Map tool.

This is presented by Engineer Philosophy pvt. ltd, working in GIS Sector an IT company. What you need to do is to just Register, login and upload only .shp and .dbf file and then export the uploaded layer to GeoJSON file by just selecting the option which appear at upper right corner in Navigation bar. You can also explore the attribute table from the website directly and filter the same which no other online tool provides.

different ways to convert Shapefile to Geojson - Online or Offline or API
different ways to convert Shapefile to Geojson – Online or Offline or API

Not only this, but you can classify the Map according to the shapefile dbf attributes and automatically classify and color it. The classified map can be exported as Scalable Vector Graphics i.e svg file.

Disclaimer: The above project is handled by me and my team and the project is in beta phase while you can definetly convert the shapefile to GeoJSON at client side securing your shapefile data. I would welcome your suggestion to improve the tool by commenting below or contacting me.

B.) Map Shapper : 

Map Shapper is the best tool which we should refer first. It is the best online tool which also handles large shapefiles and renders it quickly. Its an open source project and is licensed under MPL 2.0. Just drag the shapefile or zipped shapefile which will render the shapefile on map and can be further exported as geojson file with the option provided in tool itself.

different ways to convert Shapefile to Geojson - Online or Offline or API

With No doubt Map Shaper is much more better than any other tool for now, while the only reason why I placed this tool in second place just because the first tool was my own tool which provides more option for classifying the map, see all attributes in the data table and also exported as svg file.

2.) Offline Method – Convert Shapefile to GeoJSON in QGIS:

You must have installed QGIS  (Quantum GIS) before performing the provided steps. You may also look over other tutorial in QGIS.

1.) Open QGIS Desktop and Select Layer -> Add Layer -> Add Vector Layer or click on Add Vector layer icon appears at the upper left in the application.

different ways to convert Shapefile to Geojson - Online or Offline or API
different ways to convert Shapefile to Geojson – Online or Offline or API

2.) Select the zipped shapefile or any of file i.e .shp or .dbf or .shx by browing the folder. Note, that all the three files i.e .shp, .dbf and .shx file should be present in the same foder with same name.

3.) Once uploaded, the map will be rendered and showed in QGIS application. Now navigate to Layer menu and select Save As option or just from the layers panel select the layer and right click from it to select Save As option.

4.) A window pop up will opne up. From the window just select the GeoJSON format and provide the name of the file in the input box as shown in the image provided below. Save the file. It will export the file in GeoJSON format.

different ways to convert Shapefile to Geojson - Online or Offline or API

3.) Offline Method – Convert Shapefile to GeoJSON with command line ogr2ogr tool:

Firstly you need to install an ogr2ogr tool of GDAL which is a GIS utlitly command line tool so as to convert one file to another. Now if the ogr2ogr is installed globally check by simple tying the ogr2ogr in command line if it is working or not. Or if it residing in some file system you need to navigate to ogr2ogr file and type in the same in command line. Now Just type in the following:

  • “ogr2ogr -f GeoJSON -t_srs crs:84 [name].geojson [name].shp”

To get more option list and format you may see this gdal org link.

This tool will be helpful if you want to convert bulk files from shapefile to geojson. You can refer the .sh script found at github.

4.) Convert Shapefile to GeoJSON -API or library:

Shapefile is a binary file and cannot be viewed directly in notepad or textpad as like with GeoJSON file. So if you want to create your own API, to convert Shapefile to GeoJSON you should first have a knowledge of how to read the binary shapefile. You may refer to some of the articles which I have written some post which would help you to get the basic knowledge to know the format of files and read.

You may further refer to some of the best Shapefile to GeoJSON converter API which is open source project:

https://github.com/wavded/js-shapefile-to-geojson :  This is dedicated library to convert to GeoJSON, created by Marc Harter and Licensed with MIT.

https://github.com/gipong/shp2geojson.js : This library is also MIT Licensed and is inspired by the above wavded library which uploads zipped file of shapefile. The library provided an example to use with leaflet js.

https://github.com/mbloch/mapshaper : Map Shaper as desricbed above is licensed under MPL 2.0 and can be very useful if you want to convert to GeoJSON as well as TopoJSON.

Hope this article helped you. If are facing some problem in converting the shapefile to geojson do comment below with the problem statement. We will definitely look over that. Also you can provide your valuable comment below if you are using any other library or tool to cover the same.

5 best News maps website- Read Interactive live news on World Map

News Map Website – News, a new information either event, accident, social work, terrorists, sports, technical, launches, new innovation or election or in any form has some link with physical geographic location. How you filter latest news for a particular area or location? It would be really easy, nice and great way to filter the location based news from the interactive world map.

This news map website is really useful when you want to narrow down the data of location of which you are interested in. Not only this, but you can easily analyze new happening either good or bad around the world by seeing those sticky icons, or with cluster size or with colors.

Here are the 5 best News Map Website – Read live news on World Map

1.) Liveuamap:

Liveuamap is opendata-driven media platform that change the way you receive latest news with Map. Liveuamap supports Multi-language and provides current data from various sources and social media websites. Not only it fetches the data and shows you map but it also analyse the category of news and indicate the icon as shown below i.e like Anti-air, SAM  Biohazard, Camps, tents,  Captured Crane, construction  Dead, Destruction  Drones, robots, Drugs,  Electricity, blackout, Explosion, blasts,  Facebook, Firebombs,  Fires etc.

Liveuamap - News maps website
Liveuamap – News maps website

If you missed news from previous dates, you may select that date and grab the news easily. With website liveuamap also available in both android and iOS app. It is really an awesome and that why I have placed it on first position from all news map website.

2.) GDELT project:

GDELT project is taking feeds from various websites like Google Ideas, Google and Google News, Yahoo Fellowship, BBC monitoring etc covering over 100 languages and identifies the people, locations, organizations, counts, themes, sources, emotions, counts, quotes and events driving our global society every second of every day.

You may see their two projects one which uses CartoDB platform. You can explore the dotted map from here.

And the other which shows you live trend with image over icon on maps. With map you can also explore the advance analytics data.

news map website

3.) Heat Map News

Heat Map News is another website which takes out news from Google News and is currently running 3.1 version and is been updated since 2014. You can view hotspots over world map and click over desired area to get the current news headline over up maker popup with link to the source of news.

http://www.heatmapnews.com

We can filter out the news according to last hour, today, this week or even by selecting the date.

4.) BBC News on World Map:

BBC news is one of the most popular news network. They provided a very simple news map website. Just click over the regional view i.e continent of world and get the latest top 10 most popular news or top 10 most e-mailed news.

BBC map news - News map website

5.) There are many map news website which are live on internet. Let us list out two more:

a.) Global Incident Map:

It provides global display of terrorism and other suspicious events. They provide free as well as subscription based news. While free version of map is time delayed for 24-48 Hours. Its sub domain points to other news categories also which can be seen over map viz Amber-Alert Map, HAZMAT Situation Map, Forest Fire Map, Disease Outbreaks Map, Gang Activity, Border Security issue etc.

global incident map
global incident map

b.) Newseum:

This map fetches and display various newspaper front page around the world. You can explore this map from here.

You may also see an example of ABC news which was created with the help of Google Map Engine or my Google maps. While this map is not providing live feeds, but one can take a look over it to find the solution for how to create the map news website easily and quickly. Knowing about location of the news is really important to analyze the situation. What you think about the News and map association? Do comment below if you know any other news website displayed over map or if you want to share any important views related to this post.

Download Digital Terrain DEM (Digital Elevation Model) and create contours Maps

Digital Elevation Model is a 3D representation of a terrain. It is generated by collecting elevation points of terrain. We don’t have to do hectic work like this as webgis provides us with ready-made digital elevation data. WebGIS is where you can find all the leading information and resources for Geographical Information Systems. Here you will find how to download Digital Terrain Data and create contour map.

Download Digital Terrain Data:

1.) Go to link: http://www.webgis.com

2.) Digital Terrain data is all we need. You can explore the links given. We will download from SRTM. You can read the documentation for information. Click on SRTM 3.

3.) Click on large map.

Digital Terrain Data create contour map

4.) Here you can determine the coordinates of the tile in which your location is lying. You must know where your location is on earth i.e. North East or North West etc. As you determine the coordinates of tile, go to previous page and Click on the map where your location is.

5.) Now click the tile from the index you determined from the large map. It will automatically downloaded to your computer after clicking the link.

Digital Terrain Data create contour map

Extract DEM and create contour Map:

Contour map shows contour lines with relative space indicating the relative slope of the surface. Here we will open DEM in QGIS and create the contour Map.  Here are the steps:

1.) After opening QGIS, we first need to extract the downloaded file, and import the .hgt file using add raster layer tool in QGIS, where you will see a singleband gray image as shown below.

Digital Terrain Data create contour map

2.) Go to layer properties and click style. Notice the minimum and maximum value. These values are in meters.

Digital Terrain Data create contour map

3.) In render type dropdown select singleband pseudocolor and click classify.

Digital Terrain Data create contour map

4.) Click apply and ok.

Digital Terrain Data create contour map

5.) Now we will extract contours from this image. Go to Raster-> Extraction-> Contour as shown. 

Digital Terrain Data create contour map

6.) Set the pop up as shown below.

Digital Terrain Data create contour map

7.) Click ok. The contour file is loaded into your canvas.

Digital Terrain Data create contour map

You may also be interested in QGIS tutorial. Now you can easily analyze the surface by seeing the contour map. Hope this tutorials helped you. If you want to share some suggestion or want to ask some question do comment below.

Create 3D Map from DEM

Switch between Google New Map and Google old Map (Classic)

Switch between Google New Map and Google old Map (Classic). Google Map is a web mapping service which offers satellite imagery, street view and street map with many other functionality. Google introduced their New map in mid of 2013, with new User Interface and other improved features. While people are used to old user interface, which makes them to think again of using old (Classic Map) interface of Google Map. Google always thinks and create their product with reference to common people perspective, and that would be a reason why they have given to revert to switch to Classic Google Map. Here are the steps to revert back to classic map:

Update: (As of April 29, 2015) The steps provided below to switch back to classic map, may not work, but you can still try to use any of the link provided, for some days may be, as it will soon be updated to Google New map:

Also you may look on 8 Best Alternatives to Google Map Engine API, Google announced to deactivate Google Map Engine API from 29 January, 2016.

As an alternative you may look on Features of Google Map Lite Mode.

Switch between Google New Map and Google old Map (Classic)

1.) Open Google Map.

2.) Click Help icon, which you may find in bottom right corner of map.

Switch between Google New Map and Google old Map (Classic)

3.) Click return to classic old Google map.

4.) You can write feedback about the new map for the improvement, and again click to revert to classic map, which finally returns you to Google classic old map.

Switch between Google New Map and Google old Map (Classic)

Here is the direct link to switch back to Google Classic map from new map:

You can also switch back to new version of Google Map. By default when you open up maps.google.com, it will response with new Google map. If you getting any problem with Switching back from Google new map to Classic map, do comment below, so that we could discuss and reslove the issue. Thank you.